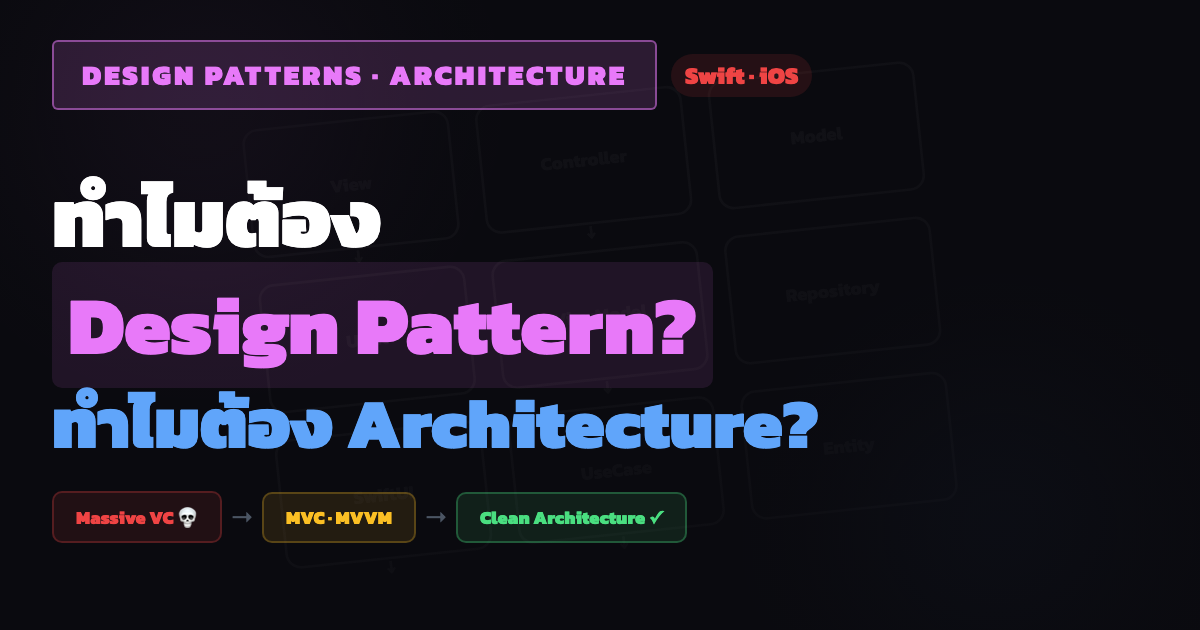
ทำไมต้อง Design Pattern? ทำไมต้อง Architecture?
“ไม่มี pattern ไหนที่ดีที่สุด มีแต่ pattern ที่เหมาะกับบริบทที่สุด”
Part 1 — ทำไมต้องมี Structure?
ปัญหาที่แท้จริง
ลองนึกภาพ app ง่ายๆ สักตัว — หน้าจอแสดง list ของ todo items จาก API แล้วกดเพิ่มได้
ถ้าเขียนแบบไม่คิดอะไรเลย ทุกอย่างจะอยู่ใน ViewController ตัวเดียว:
class TodoViewController: UIViewController {
    var todos: [Todo] = []

    override func viewDidLoad() {
        super.viewDidLoad()
        // UI setup
        let url = URL(string: "https://api.example.com/todos")!
        URLSession.shared.dataTask(with: url) { data, _, _ in
            let todos = try! JSONDecoder().decode([Todo].self, from: data!)
            self.todos = todos
            DispatchQueue.main.async {
                self.tableView.reloadData()
            }
        }.resume()
    }

    func addTodo(_ title: String) {
        // validation
        guard !title.isEmpty else { return }
        // networking
        var request = URLRequest(url: URL(string: "https://api.example.com/todos")!)
        request.httpMethod = "POST"
        request.httpBody = try! JSONEncoder().encode(["title": title])
        URLSession.shared.dataTask(with: request) { data, _, _ in
            // parse response, update UI, handle error... ทุกอย่างอยู่ที่นี่
        }.resume()
    }
}
ตอน feature มี 2-3 อัน มันก็โอเค แต่พอ app โตขึ้น:
- ไฟล์บวม — ViewController ยาว 2,000 บรรทัด (Massive View Controller)
- test ไม่ได้ — จะ test logic ต้อง instantiate ทั้ง UIViewController ซึ่งต้องมี lifecycle, storyboard, ฯลฯ
- reuse ไม่ได้ — networking logic ฝังอยู่ใน UI จะเอาไปใช้หน้าอื่นต้อง copy-paste
- ทำงานชนกัน — 3 คนแก้ไฟล์เดียวกัน merge conflict ทุกวัน
ทุกปัญหาเกิดจากสิ่งเดียว: ทุกอย่างผูกกันหมด — UI, networking, business logic, navigation อยู่ในก้อนเดียว
หลักการ: Separation of Concerns
วิธีแก้ที่เป็นสากล: แยกความรับผิดชอบออกจากกัน
แต่คำถามคือ “แยกยังไง?” — และนี่คือจุดที่ Design Pattern กับ Architecture เข้ามา
แผนที่: 2 คำถามที่ต้องตอบ
การจัด structure ของ app มี 2 level ที่ต่างกัน:
คำถามที่ 1: "หน้าจอนี้จัดโค้ดยังไง?"
→ ตอบด้วย Design Pattern (MVC, MVP, MVVM, VIPER, TCA)
→ scope: หนึ่งหน้าจอ / หนึ่ง feature

คำถามที่ 2: "ทั้ง app จัดโครงสร้างยังไง?"
→ ตอบด้วย Architecture (Clean, Hexagonal, Onion, Modular)
→ scope: ทั้ง app / ทั้ง system| Design Pattern | Architecture | |
|---|---|---|
| scope | 1 หน้าจอ / 1 module | ทั้ง app / ทั้ง system |
| ตอบคำถาม | ”code ในหน้านี้จัดยังไง?" | "layer ต่างๆ สัมพันธ์กันยังไง?” |
| ตัวอย่าง | MVC, MVP, MVVM, TCA | Clean, Hexagonal, Onion |
| อุปมา | วิธีจัดห้อง (เฟอร์นิเจอร์วางยังไง) | ผังอาคาร (กี่ชั้น บันไดอยู่ตรงไหน) |
app หนึ่งอาจใช้ Clean Architecture (3 layers) แล้วใน Presentation layer ใช้ MVVM เป็น design pattern — มันอยู่คนละ level ใช้ด้วยกันได้
บทความนี้จะไปทีละ level — เริ่มจาก Pattern (ใกล้ตัว จับต้องได้) แล้วค่อย zoom ออกไป Architecture (ภาพใหญ่)
Part 2 — Design Patterns: จัดการหนึ่งหน้าจอ
MVC — Model-View-Controller
Why MVC?
MVC คือคำตอบแรกสุดที่ Apple เลือกใช้ใน UIKit แนวคิดง่าย:
- Model — data + business logic (เช่น
Todo,TodoService) - View — สิ่งที่ user เห็น (
UILabel,UITableView) - Controller — ตัวกลางที่เชื่อม Model กับ View
User Action → Controller → Model
                  ↓
               View ← (update)
// Model
struct Todo: Codable {
let id: Int
let title: String
var isDone: Bool
}
// Service (part of Model layer)
class TodoService {
func fetchTodos(completion: @escaping ([Todo]) -> Void) {
// networking logic ย้ายมาอยู่ที่นี่
}
}
// Controller
class TodoViewController: UIViewController {
let service = TodoService()
var todos: [Todo] = []
override func viewDidLoad() {
super.viewDidLoad()
service.fetchTodos { [weak self] todos in
self?.todos = todos
self?.tableView.reloadData()
}
}
}ได้อะไร?
- Networking logic แยกออกไปอยู่ใน
TodoService— reuse ได้ - Model ไม่รู้จัก UI เลย — test ง่าย
- เข้าใจง่าย developer ใหม่เข้ามาก็รู้เรื่อง
แล้วทำไมยังไม่พอ?
ปัญหาของ MVC ใน iOS คือ UIViewController เป็นทั้ง Controller และ View ในตัว มัน own ทั้ง view lifecycle และ logic:
class TodoViewController: UIViewController {
    // View concerns
    func setupUI() { ... }
    func tableView(_ tableView: UITableView, cellForRowAt...) { ... }

    // Controller concerns
    func didTapAdd() {
        guard isValid(titleField.text) else { ... }  // validation
        service.addTodo(titleField.text!) { ... }      // business logic
        updateBadgeCount()                              // presentation logic
    }
}
ผลคือ ViewController ทำหน้าที่เยอะเกินไป — เรียกกันว่า Massive View Controller ไฟล์ยาวหลายพันบรรทัด test ยาก เพราะจะ test validation logic ก็ต้องสร้าง ViewController ขึ้นมาทั้งตัว
MVC เหมาะกับ:
- ทีมเล็ก (1-2 คน)
- App เล็ก หรือ prototype ที่ต้องการ ship เร็ว
- หน้าจอง่ายๆ ที่ไม่มี logic ซับซ้อน
- ไม่จำเป็นต้อง unit test presentation logic มาก
MVP — Model-View-Presenter
Why MVP?
ปัญหาของ MVC คือ Controller ทำงานเยอะเกินและ test ยาก MVP แก้ตรงนี้โดยดึง presentation logic ออกมาเป็น Presenter ที่เป็น plain Swift object (ไม่ import UIKit):
User Action → View → Presenter → Model
                ↑         |
                └─────────┘ (update view)
// Presenter — plain Swift, no UIKit
protocol TodoView: AnyObject {
func showTodos(_ todos: [Todo])
func showError(_ message: String)
func showLoading()
}
class TodoPresenter {
weak var view: TodoView?
let service: TodoServiceProtocol
init(service: TodoServiceProtocol) {
self.service = service
}
func viewDidLoad() {
view?.showLoading()
service.fetchTodos { [weak self] result in
switch result {
case .success(let todos):
self?.view?.showTodos(todos)
case .failure(let error):
self?.view?.showError(error.localizedDescription)
}
}
}
func didTapAdd(title: String?) {
guard let title, !title.isEmpty else {
view?.showError("Title cannot be empty")
return
}
service.addTodo(title: title) { [weak self] result in
// handle result
}
}
}
// ViewController ทำหน้าที่เป็น View เท่านั้น
class TodoViewController: UIViewController, TodoView {
var presenter: TodoPresenter!
override func viewDidLoad() {
super.viewDidLoad()
presenter.viewDidLoad()
}
func showTodos(_ todos: [Todo]) {
self.todos = todos
tableView.reloadData()
}
func showError(_ message: String) {
// show alert
}
func showLoading() {
// show spinner
}
@IBAction func addTapped() {
presenter.didTapAdd(title: titleField.text)
}
}ได้อะไร?
- Test ง่ายขึ้นมาก — Presenter ไม่ import UIKit สร้าง mock view แล้ว test ได้เลย:
class MockTodoView: TodoView {
    var shownError: String?
    func showError(_ message: String) { shownError = message }
    func showTodos(_ todos: [Todo]) { }
    func showLoading() { }
}

func testAddEmptyTitle() {
    let presenter = TodoPresenter(service: MockService())
    let mockView = MockTodoView()
    presenter.view = mockView

    presenter.didTapAdd(title: "")

    XCTAssertEqual(mockView.shownError, "Title cannot be empty")
}- ViewController เบาลง — ทำหน้าที่แค่ render สิ่งที่ Presenter บอก
- แยก concern ชัด — ใครดู UI ก็ดูที่ View ใครดู logic ก็ดูที่ Presenter
แล้วทำไมยังไม่พอ?
- Boilerplate เยอะ — ทุกหน้าจอต้องมี protocol สำหรับ View + Presenter
- View update เป็น manual — Presenter ต้องเรียก
view?.showThis(),view?.showThat()ทีละ method ถ้ามี state เยอะ ลืมเรียกง่าย - 1:1 binding — Presenter กับ View ผูกกันแน่น Presenter ออกแบบมาเพื่อ View เดียว reuse ข้าม screen ยาก
MVP เหมาะกับ:
- ทีมที่ต้องการ testability แต่ยังไม่พร้อมเปลี่ยน paradigm ใหญ่
- ทีม 2-4 คน ที่ต้องการ structure ชัดกว่า MVC
- Project ที่ใช้ UIKit แบบ traditional (delegate, callback)
- Android developer ที่ข้ามมา iOS จะคุ้นเคย
MVVM — Model-View-ViewModel
Why MVVM?
MVP ต้อง manually call view methods ทีละตัว MVVM แก้ตรงนี้ด้วยแนวคิด data binding — แทนที่ Presenter จะสั่ง View ให้ update MVVM ให้ ViewModel expose state ออกมา แล้ว View ไป observe เอาเอง:
User Action → View → ViewModel → Model
                ↑         |
                └─────────┘ (data binding / observe)
// ViewModel
class TodoViewModel: ObservableObject {
@Published var todos: [Todo] = []
@Published var errorMessage: String?
@Published var isLoading = false
private let service: TodoServiceProtocol
init(service: TodoServiceProtocol) {
self.service = service
}
func loadTodos() {
isLoading = true
service.fetchTodos { [weak self] result in
self?.isLoading = false
switch result {
case .success(let todos):
self?.todos = todos
case .failure(let error):
self?.errorMessage = error.localizedDescription
}
}
}
func addTodo(title: String) {
guard !title.isEmpty else {
errorMessage = "Title cannot be empty"
return
}
// ...
}
}ใน SwiftUI binding เกิดขึ้นโดยธรรมชาติ:
struct TodoListView: View {
    @StateObject var viewModel = TodoViewModel(service: TodoService())

    var body: some View {
        List(viewModel.todos) { todo in
            Text(todo.title)
        }
        .overlay {
            if viewModel.isLoading {
                ProgressView()
            }
        }
        .alert("Error", isPresented: .constant(viewModel.errorMessage != nil)) {
            // ...
        }
        .onAppear {
            viewModel.loadTodos()
        }
    }
}
ใน UIKit ต้องพึ่ง Combine หรือ closure-based binding:
class TodoViewController: UIViewController {
    let viewModel = TodoViewModel(service: TodoService())
    var cancellables = Set<AnyCancellable>()

    override func viewDidLoad() {
        super.viewDidLoad()

        viewModel.$todos
            .receive(on: DispatchQueue.main)
            .sink { [weak self] _ in self?.tableView.reloadData() }
            .store(in: &cancellables)

        viewModel.$isLoading
            .receive(on: DispatchQueue.main)
            .sink { [weak self] loading in self?.spinner.isHidden = !loading }
            .store(in: &cancellables)

        viewModel.loadTodos()
    }
}
ได้อะไร?
- State เป็นก้อนเดียว — ดูที่ ViewModel ก็รู้ว่าหน้าจอนี้มี state อะไรบ้าง
- Auto-sync — เปลี่ยน state ใน ViewModel แล้ว View update เอง ไม่ต้อง manually call
- Test ง่ายเท่า MVP — ViewModel เป็น plain object test ได้เลย
- SwiftUI native — MVVM คือ pattern ที่ SwiftUI ออกแบบมารองรับตั้งแต่แรก
แล้วทำไมยังไม่พอ?
- ViewModel บวมได้เหมือนกัน — ถ้าหน้าจอซับซ้อน ViewModel อาจมี 20+ @Published properties กลายเป็น “Massive ViewModel”
- Navigation logic อยู่ไหน? — MVVM ไม่ได้บอกว่า routing/navigation ควรจัดการยังไง มักจบลงที่ ViewModel รู้จัก UIKit หรือ View ทำ navigation เอง
- Dependency กระจัดกระจาย — ViewModel สร้าง service เอง หรือ inject เข้ามา? ไม่มี convention ชัด
MVVM เหมาะกับ:
- SwiftUI projects — แทบจะเป็น default choice
- ทีม 2-5 คน ที่ต้องการ balance ระหว่าง simplicity กับ testability
- App ขนาดกลาง ที่แต่ละหน้าจอมี logic พอประมาณ
- ทีมที่คุ้นเคยกับ reactive programming (Combine, RxSwift)
VIPER — View-Interactor-Presenter-Entity-Router
Why VIPER?
MVVM ยังมีปัญหาเรื่อง navigation และ ViewModel ที่รับผิดชอบเยอะเกิน VIPER แก้ด้วยการ แยกละเอียดขึ้นอีก:
- View — แสดง UI (เหมือน MVP)
- Interactor — business logic ล้วนๆ (fetch data, validate, transform)
- Presenter — เตรียม data สำหรับ display + ตัดสินใจว่าจะ navigate ไปไหน
- Entity — data model
- Router — จัดการ navigation/routing
View ↔ Presenter ↔ Interactor → Entity
            ↕
          Router
// Router — จัดการ navigation
protocol TodoRouting {
func navigateToDetail(todo: Todo)
func navigateToAddTodo()
}
class TodoRouter: TodoRouting {
weak var viewController: UIViewController?
func navigateToDetail(todo: Todo) {
let detailVC = TodoDetailBuilder.build(todo: todo)
viewController?.navigationController?.pushViewController(detailVC, animated: true)
}
}
// Interactor — pure business logic
protocol TodoInteracting {
func fetchTodos()
func addTodo(title: String)
}
class TodoInteractor: TodoInteracting {
weak var presenter: TodoPresenting?
let service: TodoServiceProtocol
func fetchTodos() {
service.fetchTodos { [weak self] result in
switch result {
case .success(let todos):
self?.presenter?.didFetchTodos(todos)
case .failure(let error):
self?.presenter?.didFailWithError(error)
}
}
}
}
// Presenter — presentation logic + routing decisions
class TodoPresenter: TodoPresenting {
weak var view: TodoViewProtocol?
var interactor: TodoInteracting
var router: TodoRouting
func viewDidLoad() {
view?.showLoading()
interactor.fetchTodos()
}
func didFetchTodos(_ todos: [Todo]) {
let viewModels = todos.map { TodoCellViewModel(title: $0.title, done: $0.isDone) }
view?.showTodos(viewModels)
}
func didSelectTodo(at index: Int) {
router.navigateToDetail(todo: todos[index])
}
}ได้อะไร?
- Single Responsibility จริงๆ — แต่ละ component ทำอย่างเดียว
- Navigation เป็นระบบ — Router จัดการ ไม่ต้องกระจาย
- Test ได้ทุก layer — Interactor test logic, Presenter test presentation, Router test navigation
- Parallel development — 5 คนทำ 5 component พร้อมกันได้ conflict น้อย
แล้วทำไมหลายทีมหนีจาก VIPER?
- Boilerplate มหาศาล — หนึ่งหน้าจอต้องสร้าง 5+ files, 5+ protocols
- Over-engineering สำหรับหน้าจอง่ายๆ — หน้า Settings ที่มีแค่ list แต่ต้อง VIPER เต็มรูปแบบ?
- Learning curve สูง — developer ใหม่เข้ามาต้องเรียนรู้ data flow ที่ซับซ้อน
- Rigid — เพิ่ม feature เล็กๆ ต้องแก้หลายไฟล์
VIPER เหมาะกับ:
- ทีมใหญ่ (5+ คน) ที่ต้อง enforce structure
- App ขนาดใหญ่ ที่มีหลายสิบหน้าจอ แต่ละหน้าจอมี logic ซับซ้อน
- Enterprise projects ที่ต้องการ code consistency ข้าม feature teams
- ทีมที่มี code template generator (เช่น Generamba, XcodeGen templates)
The Composable Architecture (TCA)
Why TCA?
MVVM กับ SwiftUI ใช้ง่ายก็จริง แต่พอ app ซับซ้อนขึ้น state management เริ่มมีปัญหา:
- State กระจายอยู่ใน @StateObject หลายตัว sync ยาก
- Side effects (API call, timer, notification) จัดการไม่เป็นระบบ
- Test ได้แค่ unit level แต่ test flow ยาก
TCA (จาก Point-Free) แก้ด้วยแนวคิด unidirectional data flow:
View → send(Action) → Reducer → new State → View updates
                         ↓
                      Effects (API calls, etc.)
                         ↓
                      Action (response) → Reducer → ...
@Reducer
struct TodoFeature {
@ObservableState
struct State: Equatable {
var todos: [Todo] = []
var isLoading = false
var errorMessage: String?
}
enum Action {
case onAppear
case todosResponse(Result<[Todo], Error>)
case addTapped(title: String)
case deleteTodo(IndexSet)
}
@Dependency(\.todoClient) var todoClient
var body: some ReducerOf<Self> {
Reduce { state, action in
switch action {
case .onAppear:
state.isLoading = true
return .run { send in
let result = await Result { try await todoClient.fetchAll() }
await send(.todosResponse(result))
}
case .todosResponse(.success(let todos)):
state.isLoading = false
state.todos = todos
return .none
case .todosResponse(.failure(let error)):
state.isLoading = false
state.errorMessage = error.localizedDescription
return .none
case .addTapped(let title):
guard !title.isEmpty else {
state.errorMessage = "Title cannot be empty"
return .none
}
// ...
return .none
case .deleteTodo(let indexSet):
state.todos.remove(atOffsets: indexSet)
return .none
}
}
}
}ได้อะไร?
- State เปลี่ยนได้ทางเดียว — ทุกการเปลี่ยนแปลงต้องผ่าน Action → Reducer ไม่มีทาง mutate state ตรงๆ debug ง่ายมาก
- Test ง่ายมากๆ — TestStore ให้ assert ทุก state change ทีละ step:
@Test func addEmptyTitle() async {
    let store = TestStore(initialState: TodoFeature.State()) {
        TodoFeature()
    }

    await store.send(.addTapped(title: "")) {
        $0.errorMessage = "Title cannot be empty"
    }
}- Side effects ถูก control — ทุก async work เป็น Effect ที่ track ได้ cancel ได้
- Composition — feature เล็กๆ ประกอบกันเป็น feature ใหญ่ได้
แล้วทำไมไม่ใช้ทุก project?
- Learning curve สูงมาก — ต้องเข้าใจ functional programming concepts
- Verbose — action เล็กๆ ก็ต้องประกาศ enum case, handle ใน reducer
- Third-party dependency — TCA เป็น library ไม่ใช่ Apple framework ต้อง maintain ตาม version
- Over-kill สำหรับ app ง่ายๆ — CRUD app ธรรมดาใช้ MVVM ก็พอ
TCA เหมาะกับ:
- App ที่ state ซับซ้อน — เช่น finance app, collaborative editing
- ทีมที่ถนัด functional programming
- Project ที่ต้องการ test coverage สูง
- ทีม 3-8 คน ที่ยอมลงทุน learning curve เพื่อ long-term maintainability
สังเกต: ยิ่งแก้ ยิ่งเห็นปัญหาที่ลึกกว่า
ถ้ามองย้อน evolution ของ design patterns:
MVC  → "แยก data ออกจาก UI"
MVP  → "แยก logic ออกมา test ได้"
MVVM → "ให้ state sync อัตโนมัติ"
VIPER → "แยกทุก concern รวมถึง navigation"
TCA  → "ควบคุม state flow ทั้งหมด"
แต่ละตัวแก้ปัญหาของตัวก่อนหน้าได้ดีขึ้น แต่สังเกตว่า ทุกตัวยังพูดถึงแค่ “code ในหน้าจอนี้” — ยังมีคำถามที่ไม่มี pattern ไหนตอบ:
- Business rule ที่ไม่เกี่ยวกับ UI เลย (เช่น “ถ้า user ค้างชำระ 3 เดือน ต้อง lock account”) ควรอยู่ตรงไหน?
- Data access (API, database, cache) ควรจัดยังไง?
- ถ้าเปลี่ยน database จาก Realm เป็น SwiftData ต้องแก้กี่ไฟล์?
- ถ้าเปลี่ยน UI framework จาก UIKit เป็น SwiftUI ต้อง rewrite business logic ด้วยมั้ย?
เมื่อ zoom ออกจาก “หนึ่งหน้าจอ” ไปมอง “ทั้ง app” — เราต้องการอะไรที่ใหญ่กว่า design pattern
นั่นคือ Architecture
Part 3 — Architecture: จัดการทั้ง App
ปัญหาที่ Design Pattern ตอบไม่ได้
ลองดู MVVM ที่ดูเหมือนจัดดีแล้ว:
class TodoViewModel: ObservableObject {
    @Published var todos: [Todo] = []

    func loadTodos() {
        let url = URL(string: "https://api.example.com/todos")!
        URLSession.shared.dataTask(with: url) { data, _, _ in
            let todos = try! JSONDecoder().decode([Todo].self, from: data!)
            let sorted = todos.sorted { !$0.isDone && $1.isDone }
            DispatchQueue.main.async { self.todos = sorted }
        }.resume()
    }
}
UI logic แยกแล้วก็จริง แต่ ViewModel ยังรู้มากเกินไป:
- รู้ว่า API อยู่ที่ URL ไหน (infrastructure detail)
- รู้ว่าใช้
URLSession(networking framework) - รู้ว่าต้อง decode ด้วย
JSONDecoder(serialization detail) - มี business rule (sort pending first) ผสมอยู่ด้วย
ถ้าวันหนึ่ง:
- เปลี่ยนจาก REST เป็น GraphQL → ต้องแก้ ViewModel
- เพิ่ม offline cache → ต้องแก้ ViewModel
- เอา business rule ไปใช้ใน widget extension → ต้อง copy code
นี่คือปัญหาของ coupling ข้าม layer — ปัญหาที่ต้องแก้ด้วย architecture
Dependency Inversion — หลักการที่ทุก Architecture ตั้งอยู่บน
ก่อนจะดู Clean/Hexagonal/Onion ต้องเข้าใจ concept นี้ก่อน เพราะ ทั้ง 3 ตัวเป็นแค่ 3 วิธีจัดโครงสร้างรอบหลักการเดียวกัน
ปัญหา: dependency ไหลผิดทาง
สมมติแบ่ง code เป็น layer แบบตรงไปตรงมา (Layered Architecture):
Presentation → Business Logic → Data Access (API, DB)Business Logic (ส่วนที่มีค่าที่สุด เปลี่ยนน้อยที่สุด) กลับ depend on Data Access (ส่วนที่เปลี่ยนบ่อย — เปลี่ยน API endpoint, เปลี่ยน database, เพิ่ม cache):
class TodoService {
    let api = TodoAPI()  // ← ผูกตรงกับ concrete class

    func getPendingFirst() async throws -> [Todo] {
        let dtos = try await api.fetchAll()       // ← ต้องยิง API จริง ถึงจะ test ได้
        return dtos.map { Todo(from: $0) }
            .sorted { !$0.isDone && $1.isDone }
    }
}- Test ยาก — ต้องให้
TodoAPIยิง API จริง - เปลี่ยน data source ยาก — จะเปลี่ยนเป็น Core Data ต้องแก้
TodoService - Business logic ผูกกับ infrastructure
วิธีแก้: กลับทิศ dependency ด้วย protocol
แทนที่ Business Logic จะเรียก TodoAPI ตรงๆ ให้มัน define protocol (สัญญา) ว่าอยากได้อะไร แล้วให้ Data layer มา implement:
// Business Logic layer DEFINE สัญญา
protocol TodoRepository {
    func fetchAll() async throws -> [Todo]
}

// Business Logic layer ใช้สัญญา (ไม่สนว่าใครทำจริง)
struct FetchTodosUseCase {
    let repository: TodoRepository  // ← depend on protocol, not concrete

    func execute() async throws -> [Todo] {
        let todos = try await repository.fetchAll()
        return todos.sorted { !$0.isDone && $1.isDone }
    }
}

// Data layer IMPLEMENT สัญญา
class TodoAPIRepository: TodoRepository {
    func fetchAll() async throws -> [Todo] {
        let (data, _) = try await URLSession.shared.data(from: apiURL)
        return try JSONDecoder().decode([Todo].self, from: data)
    }
}

// Test ก็ IMPLEMENT สัญญาอีกแบบ
class MockTodoRepository: TodoRepository {
    var stubbedTodos: [Todo] = []
    func fetchAll() async throws -> [Todo] { stubbedTodos }
}
ตอนนี้ dependency กลับทิศ:
ก่อน:  Business Logic  →  Data Access
       (depend on concrete)

หลัง:  Business Logic  ←  Data Access
       (define protocol)    (implement protocol)
Business Logic ไม่รู้จัก URLSession ไม่รู้จัก Core Data ไม่รู้จักอะไรเลย มันรู้จักแค่ TodoRepository protocol ที่มันเป็นคน define เอง
ผลคือ:
- เปลี่ยนจาก REST เป็น GraphQL? สร้าง
TodoGraphQLRepositoryconformTodoRepository— ไม่แก้ business logic เลย - เพิ่ม cache? สร้าง
CachedTodoRepositoryที่ wrap ตัวอื่น - Test? inject
MockTodoRepositoryเข้าไป
นี่คือ foundation — ต่อไปจะดูว่า Clean, Hexagonal, Onion จัดโครงสร้างรอบหลักการนี้ยังไง (ต่างกันแค่ lens ที่มอง)
Clean Architecture (Uncle Bob, 2012)
Why Clean Architecture?
Robert C. Martin (Uncle Bob) จัดโครงสร้างเป็น concentric circles — ยิ่งอยู่ข้างในยิ่งสำคัญ ยิ่ง stable:
┌─────────────────────────────────────────────┐
│  Frameworks & Drivers (outermost)           │
│  ┌─────────────────────────────────────┐    │
│  │  Interface Adapters                  │    │
│  │  ┌─────────────────────────────┐    │    │
│  │  │  Use Cases                   │    │    │
│  │  │  ┌─────────────────────┐    │    │    │
│  │  │  │  Entities (core)    │    │    │    │
│  │  │  └─────────────────────┘    │    │    │
│  │  └─────────────────────────────┘    │    │
│  └─────────────────────────────────────┘    │
└─────────────────────────────────────────────┘

The Dependency Rule: source code dependencies ชี้เข้าข้างในเท่านั้น
4 ชั้น (จากในสุดออกมา):
| Layer | หน้าที่ | ตัวอย่าง |
|---|---|---|
| Entities | core business objects + enterprise-wide rules | Todo, User, Order + rules เช่น “order > 10,000 ต้องอนุมัติ” |
| Use Cases | application-specific business rules | FetchTodosUseCase, CreateOrderUseCase |
| Interface Adapters | แปลง data ระหว่าง layer | ViewModel, Presenter, Repository implementations, DTO mapping |
| Frameworks & Drivers | external tools | UIKit, SwiftUI, URLSession, CoreData, Firebase |
กฎเหล็ก: The Dependency Rule
Dependency ชี้เข้าข้างในเท่านั้น — วงนอกรู้จักวงใน แต่วงในไม่รู้จักวงนอก:
- Entities ไม่รู้จักอะไรเลย (pure Swift)
- Use Cases รู้จัก Entities แต่ไม่รู้จัก UI หรือ database
- Interface Adapters รู้จัก Use Cases แต่ไม่รู้จัก framework ตรงๆ
- Frameworks & Drivers อยู่นอกสุด เปลี่ยนได้โดยไม่กระทบ core
// === Entities (innermost) ===
struct Todo {
    let id: UUID
    var title: String
    var isDone: Bool
    var createdAt: Date

    var isOverdue: Bool {
        !isDone && Date().timeIntervalSince(createdAt) > 7 * 24 * 3600
    }
}

// === Use Cases ===
protocol TodoRepository {
    func fetchAll() async throws -> [Todo]
    func save(_ todo: Todo) async throws
}

struct FetchTodosUseCase {
    let repository: TodoRepository

    func execute() async throws -> [Todo] {
        let todos = try await repository.fetchAll()
        return todos.sorted { !$0.isDone && $1.isDone }
    }
}

struct ToggleTodoUseCase {
    let repository: TodoRepository

    func execute(todo: Todo) async throws {
        var updated = todo
        updated.isDone.toggle()
        try await repository.save(updated)
    }
}

// === Interface Adapters ===
class TodoListViewModel: ObservableObject {
    @Published var todos: [TodoRowItem] = []
    private let fetchTodos: FetchTodosUseCase
    private let toggleTodo: ToggleTodoUseCase

    init(fetchTodos: FetchTodosUseCase, toggleTodo: ToggleTodoUseCase) {
        self.fetchTodos = fetchTodos
        self.toggleTodo = toggleTodo
    }

    func load() async {
        do {
            let todos = try await fetchTodos.execute()
            self.todos = todos.map { TodoRowItem(todo: $0) }
        } catch {
            // handle error
        }
    }
}

class TodoAPIRepository: TodoRepository {
    let client: HTTPClient

    func fetchAll() async throws -> [Todo] {
        let dtos: [TodoDTO] = try await client.get("/todos")
        return dtos.map { $0.toDomain() }
    }

    func save(_ todo: Todo) async throws {
        let dto = TodoDTO(from: todo)
        try await client.put("/todos/\(todo.id)", body: dto)
    }
}

// === Frameworks & Drivers (outermost) ===
// SwiftUI View, URLSession-based HTTPClient, CoreData, etc.
ได้อะไร?
- Business logic อยู่ตรงกลาง ปลอดภัยจากการเปลี่ยนแปลง — เปลี่ยน UI framework? ไม่กระทบ Use Cases
- Test business logic ได้ 100% โดยไม่ต้อง mock framework — Use Cases + Entities เป็น pure Swift
- ชัดเจนว่า “business rule” อยู่ตรงไหน — อยู่ใน Entities + Use Cases ไม่กระจัดกระจาย
ทำไมหลายทีม implement แล้วปวดหัว?
- 4 layers เยอะเกินสำหรับ app เล็ก — CRUD app มี business rule น้อย Use Case layer กลายเป็น pass-through (แค่เรียก repository แล้ว return)
- Mapping เยอะ — Entity → DTO → Response → ViewModel แต่ละ layer มี model ของตัวเอง
- ไม่ได้บอกชัดว่า “external system” มีอะไรบ้าง — API เป็น external แล้ว Push Notification ล่ะ? Analytics?
Clean Architecture เหมาะกับ:
- App ที่มี business logic ซับซ้อน ที่ต้องอยู่ได้นานกว่า UI framework
- ทีมใหญ่ ที่แบ่ง layer ownership (frontend team / domain team)
- Project ที่ต้องเปลี่ยน data source เช่น migrate จาก Realm ไป SwiftData
- Multi-platform — domain logic ใช้ร่วมกันระหว่าง iOS/macOS/watchOS
Hexagonal Architecture / Ports & Adapters (Alistair Cockburn, 2005)
Why Hexagonal?
Hexagonal (หรือ Ports & Adapters) เกิดก่อน Clean Architecture มอง structure ต่างออกไป — ไม่คิดเป็นชั้นๆ แต่คิดเป็น inside/outside:
                  ┌─────────────────────┐
   Driving        │                     │        Driven
   (input)        │    Application      │        (output)
                  │      Core           │
  ┌─────┐  Port  │                     │  Port  ┌─────────┐
  │ UI  │──────→ │  Business Logic     │ ──────→│ Database │
  └─────┘        │  + Domain Model     │        └─────────┘
  ┌─────┐  Port  │                     │  Port  ┌─────────┐
  │ API │──────→ │                     │ ──────→│ Email    │
  └─────┘        │                     │        └─────────┘
  ┌─────┐  Port  │                     │  Port  ┌─────────┐
  │Test │──────→ │                     │ ──────→│ Mock     │
  └─────┘        └─────────────────────┘        └─────────┘
key concepts:
- Application Core = business logic + domain model (ข้างใน hexagon)
- Port = interface (protocol) ที่เป็นช่องทางเข้า/ออก
- Adapter = implementation ที่เชื่อม port กับ external system
มี 2 ประเภท port:
| Driving Port (input) | Driven Port (output) | |
|---|---|---|
| ทิศทาง | โลกภายนอก → Application | Application → โลกภายนอก |
| ใคร define | Application define interface | Application define interface |
| ตัวอย่าง | ManagingTodos | StoringTodos, SendingNotifications |
| Adapter | UI controller, REST endpoint, test | API client, SMTP client, mock |
// === APPLICATION CORE ===

// Driving Port — "application ทำอะไรได้บ้าง"
protocol ManagingTodos {
    func allTodos() async throws -> [Todo]
    func addTodo(title: String) async throws -> Todo
    func toggleTodo(id: UUID) async throws
}

// Driven Port — "application ต้องการอะไรจากข้างนอก"
protocol StoringTodos {
    func fetchAll() async throws -> [Todo]
    func save(_ todo: Todo) async throws
}

protocol SendingNotifications {
    func notify(user: User, message: String) async throws
}

// Application Service — implements driving port, uses driven ports
class TodoService: ManagingTodos {
    let store: StoringTodos
    let notifier: SendingNotifications

    init(store: StoringTodos, notifier: SendingNotifications) {
        self.store = store
        self.notifier = notifier
    }

    func addTodo(title: String) async throws -> Todo {
        let todo = Todo(id: UUID(), title: title, isDone: false)
        try await store.save(todo)
        try await notifier.notify(user: currentUser, message: "Todo added: \(title)")
        return todo
    }

    func toggleTodo(id: UUID) async throws {
        var todos = try await store.fetchAll()
        guard let index = todos.firstIndex(where: { $0.id == id }) else { return }
        todos[index].isDone.toggle()
        try await store.save(todos[index])
    }
}

// === ADAPTERS (outside the hexagon) ===

// Driving Adapter — SwiftUI connects to driving port
struct TodoListView: View {
    let service: ManagingTodos

    var body: some View { /* ... */ }
}

// Driven Adapter — SQLite
class SQLiteTodoStore: StoringTodos {
    func fetchAll() async throws -> [Todo] { /* SQLite queries */ }
    func save(_ todo: Todo) async throws { /* SQLite insert */ }
}

// Driven Adapter — Push notification
class PushNotificationSender: SendingNotifications {
    func notify(user: User, message: String) async throws { /* APNs */ }
}

// Driven Adapter — Mock for testing
class MockTodoStore: StoringTodos {
    var todos: [Todo] = []
    func fetchAll() async throws -> [Todo] { todos }
    func save(_ todo: Todo) async throws { todos.append(todo) }
}
Hexagonal vs Clean — ต่างกันตรงไหน?
| Clean Architecture | Hexagonal | |
|---|---|---|
| โครงสร้าง | concentric circles (4 layers) | hexagon: inside vs outside |
| จำนวน layers | 4 (Entities, Use Cases, Adapters, Frameworks) | 2 (Application Core, Adapters) |
| แยก entity กับ use case? | แยกชัด 2 layers | รวมอยู่ใน Application Core |
| เน้น | Dependency Rule (ชี้เข้าข้างใน) | Ports & Adapters (ช่องทางเข้า/ออกชัดเจน) |
| จุดเด่น | business rule หลายระดับ | symmetry — UI กับ Database เป็น “external” เท่าเทียมกัน |
จุดต่างที่สำคัญที่สุด: Hexagonal มองว่า UI กับ Database เท่าเทียมกัน — ทั้งคู่เป็นแค่ “adapter” ที่ต่อเข้ากับ core ผ่าน port โดยเฉพาะเรื่อง driving vs driven ที่ช่วยแยกชัดว่า “ใครเรียกเรา” vs “เราเรียกใคร”
Hexagonal เหมาะกับ:
- System ที่มี external dependencies เยอะ — API, database, message queue, push notification, analytics, payment
- Backend / server-side Swift — มี input หลายทาง (REST, GraphQL, CLI, queue consumer)
- ทีมที่ต้องการเปลี่ยน infrastructure ได้ง่าย
- Microservices — แต่ละ service มี ports ชัดเจน
Onion Architecture (Jeffrey Palermo, 2008)
Why Onion?
Onion Architecture อยู่กลางๆ ระหว่าง Clean กับ Hexagonal — เป็น concentric circles เหมือน Clean แต่ focus ที่ Domain Model เป็นศูนย์กลาง:
┌───────────────────────────────────────┐
│         Infrastructure                │  UI, DB, API, Frameworks
│  ┌───────────────────────────────┐    │
│  │     Application Services      │    │  Use Cases, orchestration
│  │  ┌───────────────────────┐    │    │
│  │  │  Domain Services       │    │    │  Business rules ข้าม entities
│  │  │  ┌───────────────┐    │    │    │
│  │  │  │ Domain Model  │    │    │    │  Entities + Value Objects
│  │  │  └───────────────┘    │    │    │
│  │  └───────────────────────┘    │    │
│  └───────────────────────────────┘    │
└───────────────────────────────────────┘
ต่างจาก Clean Architecture ตรงที่ แบ่ง business logic ละเอียดกว่า:
| Clean | Onion | |
|---|---|---|
| inner core | Entities (data + basic rules) | Domain Model (Entities + Value Objects + Domain Events) |
| business logic กี่ชั้น | 2 (Entities, Use Cases) | 3 (Domain Model, Domain Services, App Services) |
| เน้น | Dependency Rule ทั่วไป | Domain-Driven Design (DDD) concepts |
// === Domain Model (innermost) ===
struct Money: Equatable {
    let amount: Decimal
    let currency: Currency

    static func + (lhs: Money, rhs: Money) -> Money {
        precondition(lhs.currency == rhs.currency)
        return Money(amount: lhs.amount + rhs.amount, currency: lhs.currency)
    }
}

struct Order {
    let id: UUID
    var items: [OrderItem]
    var status: OrderStatus

    var total: Money {
        items.reduce(Money(amount: 0, currency: .thb)) { $0 + $1.subtotal }
    }

    mutating func approve() throws {
        guard status == .pending else { throw OrderError.cannotApprove(status) }
        guard total.amount > 0 else { throw OrderError.emptyOrder }
        status = .approved
    }
}

// === Domain Services (cross-entity business rules) ===
protocol PricingPolicy {
    func applyDiscount(to order: Order, customer: Customer) -> Money
}

struct VIPPricingPolicy: PricingPolicy {
    func applyDiscount(to order: Order, customer: Customer) -> Money {
        guard customer.isVIP else { return Money(amount: 0, currency: .thb) }
        return Money(amount: order.total.amount * 0.1, currency: .thb)
    }
}

// === Application Services (orchestration) ===
protocol OrderRepository {
    func findById(_ id: UUID) async throws -> Order?
    func save(_ order: Order) async throws
}

struct ApproveOrderUseCase {
    let orderRepo: OrderRepository
    let pricingPolicy: PricingPolicy
    let notifier: OrderNotifying

    func execute(orderId: UUID) async throws {
        guard var order = try await orderRepo.findById(orderId) else {
            throw OrderError.notFound
        }
        try order.approve()
        try await orderRepo.save(order)
        try await notifier.notifyApproved(order)
    }
}
Onion เหมาะกับ:
- App ที่ domain ซับซ้อนจริงๆ — e-commerce, finance, healthcare
- ทีมที่ใช้ Domain-Driven Design (DDD)
- System ที่ business rule เปลี่ยนบ่อย แต่ต้องมั่นใจว่าไม่ break
3 Architecture เดียวกัน ต่าง lens
ความจริงที่สำคัญที่สุดของ section นี้:
Clean, Hexagonal, Onion ใช้หลักการเดียวกัน — Dependency Inversion — ต่างกันแค่วิธีอธิบายและจัดโครงสร้าง
Hexagonal:  2 zones  — Application Core | Adapters
Clean:      4 layers — Entities | Use Cases | Adapters | Frameworks
Onion:      4 layers — Domain Model | Domain Services | App Services | Infrastructure
ทั้ง 3 ตัวเห็นตรงกันว่า:
- Business logic อยู่ตรงกลาง
- Dependencies ชี้เข้าข้างใน
- External concerns (UI, DB, API) อยู่ข้างนอก เปลี่ยนได้
วิธีเลือก:
| สถานการณ์ | เลือก | เหตุผล |
|---|---|---|
| external system เยอะ, input หลายทาง | Hexagonal | Ports & Adapters, driving vs driven ชัดเจน |
| business logic ซับซ้อน, ใช้ DDD | Onion | แบ่ง domain ละเอียด 3 ชั้น |
| ต้องการ general guideline | Clean | Dependency Rule เป็น concept กว้างที่สุด |
| app ง่ายๆ ไม่ต้องซีเรียส | ไม่ต้องเลือก | MVVM ธรรมดาก็พอ |
Architecture อื่นๆ ที่ควรรู้จัก
Modular Architecture
ไม่ได้แข่งกับ Clean/Hexagonal แต่เป็น orthogonal concept — แทนที่จะแบ่งตาม layer แบ่งตาม feature:
App/
├── TodoModule/        ← feature module
│   ├── Domain/
│   ├── Data/
│   └── Presentation/
├── AuthModule/        ← feature module
│   ├── Domain/
│   ├── Data/
│   └── Presentation/
└── SharedModule/      ← shared utilities
แต่ละ module เป็น Swift Package ที่ build ได้อิสระ ข้อดี:
- Build time เร็วขึ้น — เปลี่ยน TodoModule ไม่ต้อง rebuild AuthModule
- Parallel development — แต่ละทีม own module ของตัวเอง
- Enforce boundaries — import ข้ามต้อง explicit
ในทางปฏิบัติมักใช้ Modular + Clean/Hexagonal — Modular แบ่ง feature, Clean/Hexagonal จัดโครงสร้างในแต่ละ module
Event-Driven Architecture
แทนที่ component จะเรียกกันตรง ใช้ events สื่อสาร:
// แทนที่จะ...
class OrderService {
    let emailService: EmailService
    let analyticsService: AnalyticsService

    func placeOrder(_ order: Order) {
        save(order)
        emailService.sendConfirmation(order)     // tight coupling
        analyticsService.trackPurchase(order)     // tight coupling
    }
}

// ใช้ events...
class OrderService {
    let eventBus: EventBus

    func placeOrder(_ order: Order) {
        save(order)
        eventBus.publish(OrderPlaced(order: order))  // ไม่รู้จักใครเลย
    }
}

// listeners register separately
eventBus.subscribe(OrderPlaced.self) { event in
    emailService.sendConfirmation(event.order)
}
eventBus.subscribe(OrderPlaced.self) { event in
    analyticsService.trackPurchase(event.order)
}
เหมาะกับ: system ที่มี side effects เยอะ (notification, analytics, audit log) และไม่อยากให้ core logic ต้องรู้จัก side effect ทั้งหมด
Part 4 — ประกอบร่าง
Big Picture: ทุกอย่างเชื่อมกันยังไง
                    Architecture (app-level structure)
                    ┌─────────────────────────────────┐
                    │                                 │
              ┌─────┴──────┐    ┌──────┴───────┐    ┌─┴───────────┐
              │   Clean    │    │  Hexagonal   │    │   Onion     │
              │ (4 layers) │    │(ports/adapt) │    │ (DDD-focus) │
              └─────┬──────┘    └──────┬───────┘    └─┬───────────┘
                    │                  │               │
                    └──────────┬───────┘───────────────┘
                               │
                    All based on: Dependency Inversion
                               │
                    ┌──────────┴──────────┐
                    │  Presentation Layer  │ ← Design Pattern เสียบตรงนี้
                    │                     │
              ┌─────┴──┐ ┌──┴──┐ ┌──┴───┐ ┌──┴──┐
              │  MVC   │ │ MVP │ │ MVVM │ │ TCA │
└────────┘ └─────┘ └──────┘ └─────┘- Architecture บอกว่า app มีกี่ layer, dependency ไหลยังไง
- Design Pattern บอกว่าใน Presentation layer จัดโค้ดยังไง
- Dependency Inversion คือกาวที่เชื่อมทุกอย่าง
Decision Framework: เลือกยังไง
คำถามที่ต้องตอบก่อนเลือก Pattern
| คำถาม | ถ้าตอบว่า… | Pattern ที่เหมาะ |
|---|---|---|
| ทีมมีกี่คน? | 1-2 คน | MVC, MVVM |
| 3-5 คน | MVVM, MVP | |
| 5+ คน | VIPER, Clean Arch | |
| ต้อง unit test แค่ไหน? | ไม่ค่อย test | MVC |
| test business logic | MVP, MVVM | |
| test ทุก layer | VIPER, TCA, Clean | |
| UI framework? | SwiftUI | MVVM, TCA |
| UIKit | MVP, MVVM, VIPER | |
| State ซับซ้อนแค่ไหน? | ง่าย (CRUD) | MVC, MVVM |
| ซับซ้อน (real-time, offline, sync) | TCA, Clean Arch | |
| App อายุคาดว่านานแค่ไหน? | Prototype / MVP | MVC |
| 1-3 ปี | MVVM | |
| 3+ ปี, enterprise | Clean Arch + MVVM/VIPER |
คำถามที่ต้องตอบก่อนเลือก Architecture
| คำถาม | ถ้าตอบว่า… | Architecture ที่เหมาะ |
|---|---|---|
| มี business rule ซับซ้อนมั้ย? | แทบไม่มี (CRUD) | ไม่ต้องมี architecture layer แยก |
| มี แต่ไม่ซับซ้อน | Clean Architecture (simple version) | |
| ซับซ้อนมาก (DDD-level) | Onion Architecture | |
| มี external system กี่ตัว? | 1-2 (API + DB) | Clean ก็พอ |
| 5+ (API, DB, push, analytics, payment…) | Hexagonal — ports/adapters ชัด | |
| ต้อง swap infrastructure มั้ย? | ไม่น่าเปลี่ยน | อย่า over-abstract |
| อาจเปลี่ยน | Hexagonal หรือ Clean | |
| ทีมแบ่งยังไง? | feature teams | Modular Architecture |
| layer teams (frontend/backend/domain) | Clean/Onion layer structure |
ความจริงที่ไม่ค่อยมีใครพูด
1. ผสมได้
ไม่มีกฎว่าทุกหน้าจอต้องใช้ pattern เดียวกัน:
- หน้า Settings ง่ายๆ → MVC ก็พอ
- หน้า Checkout ที่มี logic เยอะ → MVVM + Clean Architecture
- หน้า Chat ที่ state ซับซ้อน → TCA
2. Pattern ไม่ใช่ศาสนา
ถ้า MVVM ViewModel เริ่มบวม ไม่จำเป็นต้องเปลี่ยนไป VIPER ทั้ง app อาจแค่แยก ViewModel เป็น sub-ViewModels หรือดึง logic ออกเป็น use case ก็พอ
3. Consistency สำคัญกว่า “ดีที่สุด”
ทีม 10 คนที่ทุกคนเขียน MVVM แบบเดียวกัน > ทีม 10 คนที่ 3 คนใช้ VIPER, 4 คนใช้ MVVM, 3 คนใช้ TCA
4. เริ่มง่ายก่อน แล้ว evolve
MVC → "ViewController บวมแล้ว" → ดึง logic ออกมาเป็น ViewModel → MVVM
MVVM → "state sync ยาก" → เพิ่ม unidirectional flow → TCA-like
MVVM → "navigation วุ่นวาย" → เพิ่ม Router/Coordinator → hybrid
MVVM → "ViewModel รู้มากเกิน" → แยก Use Case + Repository → Clean Architecture
ไม่จำเป็นต้องออกแบบ architecture สมบูรณ์แบบตั้งแต่วันแรก architecture ที่ดีคือ architecture ที่ evolve ตาม requirement ที่เปลี่ยนไป
สรุป — วิธีคิดเบื้องหลังการเลือก
ทุก design pattern และ architecture เกิดจากคำถามเดียว: “ตรงไหนที่เจ็บ?”
ระดับหน้าจอ (Design Pattern):
- ViewController ยาวเกิน? → แยก logic ออกมา (MVP, MVVM)
- Test ไม่ได้? → ทำให้ logic ไม่ผูกกับ UI (MVP, MVVM, TCA)
- State sync ยาก? → unidirectional data flow (TCA)
- Navigation วุ่นวาย? → Router/Coordinator (VIPER)
ระดับ app (Architecture):
- ทีมทำงานชนกัน? → แยก layer ชัด (Clean Architecture)
- Business logic ผูกกับ framework? → Dependency Inversion (Clean, Hexagonal, Onion)
- External system เยอะ จัดไม่ลง? → Ports & Adapters (Hexagonal)
- Domain ซับซ้อน มี rule ข้าม entities? → Domain-centric (Onion, DDD)
- Build ช้า ทีมชนกัน? → Modular Architecture
อย่าเลือก pattern หรือ architecture เพราะมันอยู่ใน trend หรือเพราะ blog ดังๆ บอก เลือกเพราะมันแก้ปัญหาที่ทีมเจออยู่จริงๆ
Pattern ที่ดีที่สุดคือ pattern ที่ทุกคนในทีมเข้าใจ แก้ปัญหาที่มีอยู่จริง และไม่สร้างปัญหาใหม่ที่ใหญ่กว่าเดิม