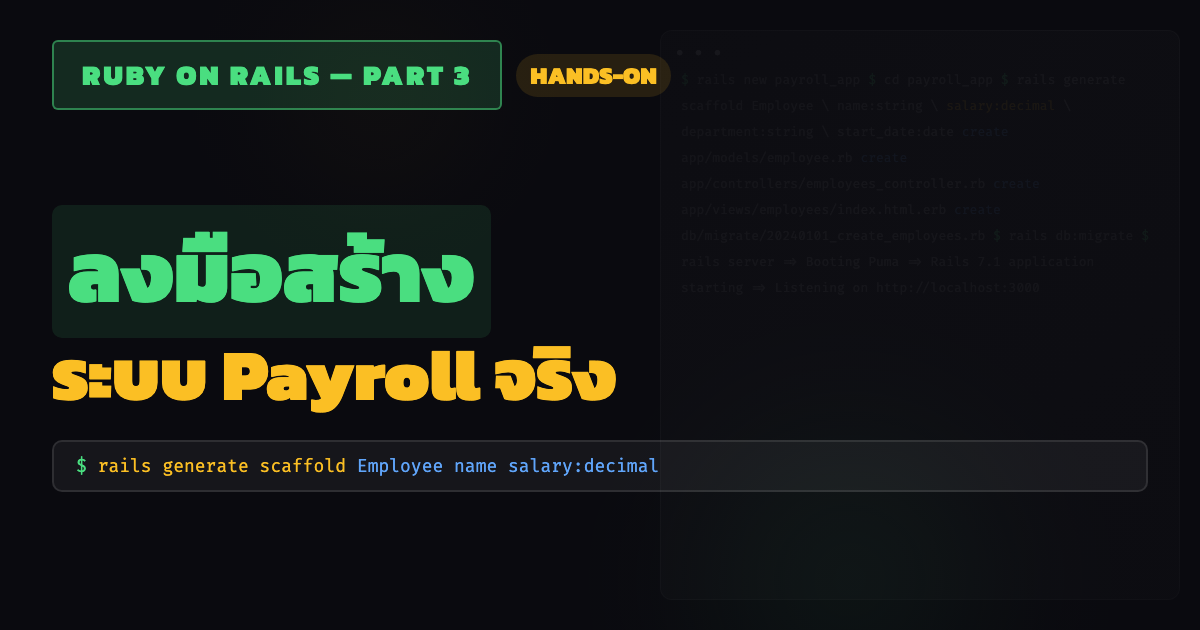
Ruby on Rails — ลงมือสร้างระบบ Payroll + ของดีที่มากับ Rails
“3 คำสั่ง ได้ CRUD เต็มรูปแบบ — scaffold generate, db:migrate, server”
อ่าน Part 1-2 มาแล้ว รู้ว่า Rails คืออะไร ทำงานยังไง — ตอนนี้ถึงเวลาลงมือสร้างจริง จะพาสร้าง Payroll app (ระบบเงินเดือน + ลงเวลา) ตั้งแต่ศูนย์ ทีละ step แล้วต่อด้วยของดีๆ ที่ Rails แถมมาให้ฟรี รวมถึง Authentication กับ API mode ที่ใช้กันใน production จริง
Part 1 — Get Started: สร้างระบบ Payroll ด้วย Rails ตั้งแต่ศูนย์
Step 0 — ติดตั้ง Ruby และ Rails
macOS
# ติดตั้ง Homebrew (ถ้ายังไม่มี)
/bin/bash -c "$(curl -fsSL https://raw.githubusercontent.com/Homebrew/install/HEAD/install.sh)"

# ติดตั้ง rbenv — ตัวจัดการ Ruby version
brew install rbenv ruby-build

# เพิ่ม rbenv เข้า shell (ถ้าใช้ zsh)
echo 'eval "$(rbenv init - zsh)"' >> ~/.zshrc
source ~/.zshrc

# ติดตั้ง Ruby
rbenv install 3.4.5
rbenv global 3.4.5    # ตั้งเป็น default version

# เช็คว่าได้แล้ว
ruby -v   # => ruby 3.4.5
Linux (Ubuntu/Debian)
sudo apt update
sudo apt install -y git curl libssl-dev libreadline-dev zlib1g-dev

# ติดตั้ง rbenv
curl -fsSL https://github.com/rbenv/rbenv-installer/raw/HEAD/bin/rbenv-installer | bash
echo 'eval "$(~/.rbenv/bin/rbenv init - bash)"' >> ~/.bashrc
source ~/.bashrc

rbenv install 3.4.5
rbenv global 3.4.5
Windows
# วิธีง่ายสุด — ใช้ WSL2 (Windows Subsystem for Linux) แล้วทำตาม Linux ข้างบน
# หรือใช้ RubyInstaller: https://rubyinstaller.org
ติดตั้ง Rails
# gem คือ package manager ของ Ruby (เหมือน npm ของ Node, pip ของ Python)
gem install rails

# เช็คว่าได้แล้ว
rails -v   # => Rails 8.1.x
Step 1 — สร้าง Project ใหม่
มี 2 แบบ:
แบบ A — ใช้ SQLite (ง่ายสุด ไม่ต้อง setup อะไร)
rails new payroll_appSQLite เก็บ database เป็นไฟล์ตัวเดียว ไม่ต้องติดตั้ง database server แยก — เหมาะสำหรับเรียนรู้และ prototype
แบบ B — ใช้ PostgreSQL + Docker Compose (เหมือน production จริง)
ถ้าอยากใช้ PostgreSQL ตั้งแต่แรก (แนะนำ เพราะ production ส่วนใหญ่ใช้ PostgreSQL):
rails new payroll_app -d postgresqlflag -d postgresql บอก Rails ให้ config database.yml สำหรับ PostgreSQL แทน SQLite
ปัญหาคือ — ต้องมี PostgreSQL server รันอยู่ก่อน ติดตั้ง native บน macOS/Linux/Windows มันยุ่ง ทางที่ง่ายที่สุดคือใช้ Docker Compose:
ติดตั้ง Docker Desktop — โหลดจาก docker.com แล้ว install ตามปกติ (ทุก OS)
สร้างไฟล์ docker-compose.yml ไว้ที่ root ของ project:
# docker-compose.yml
services:
  db:
    image: postgres:17
    environment:
      POSTGRES_USER: postgres
      POSTGRES_PASSWORD: postgres
    ports:
      - "5432:5432"
    volumes:
      - pgdata:/var/lib/postgresql/data

volumes:
  pgdata:
แก้ config/database.yml ส่วน development ให้ชี้ไป Docker:
development:
  <<: *default
  database: payroll_app_development
  username: postgres
  password: postgres
  host: localhost
  port: 5432
แล้ว start PostgreSQL:
docker compose up -d    # start PostgreSQL container (รันอยู่ background)
rails db:create         # สร้าง database
เท่านี้จบ — ไม่ต้อง install PostgreSQL ลงเครื่องเลย Docker จัดการให้หมด
tip:
docker compose up -dรันทิ้งไว้ได้เลย กิน RAM ไม่มาก หยุดได้ด้วยdocker compose down(database ไม่หาย เพราะเก็บใน volume)
cd payroll_appดู structure ที่ได้:
payroll_app/
├── app/                    # code หลักอยู่ที่นี่
│   ├── controllers/        # รับ request, เรียก model, ส่ง response
│   ├── models/             # business logic, database interaction
│   ├── views/              # HTML templates
│   │   └── layouts/        # layout หลัก (เหมือน template ครอบ)
│   ├── helpers/            # view helper methods
│   ├── javascript/         # JS (Hotwire/Turbo)
│   ├── jobs/               # background jobs
│   ├── mailers/            # email
│   └── channels/           # WebSocket (Action Cable)
├── config/
│   ├── routes.rb           # URL routing — กำหนดว่า URL ไหนไป controller ไหน
│   ├── database.yml        # database config
│   └── environments/       # config แยกตาม environment
│       ├── development.rb
│       ├── test.rb
│       └── production.rb
├── db/
│   ├── migrate/            # database migrations
│   ├── schema.rb           # snapshot ของ database schema ปัจจุบัน
│   └── seeds.rb            # seed data สำหรับ development
├── test/                   # tests
├── public/                 # static files (favicon, 404.html)
├── Gemfile                 # dependencies (เหมือน package.json)
└── Gemfile.lock            # locked versions (เหมือน package-lock.json)
Step 2 — รัน server ครั้งแรก
# ถ้าใช้ PostgreSQL ต้อง start Docker ก่อน (ข้ามถ้าใช้ SQLite)
docker compose up -d

# สร้าง database (ถ้ายังไม่ได้สร้าง)
rails db:create

# start Rails server
rails server
# หรือแบบสั้น
rails s
เปิด browser ไปที่ http://localhost:3000 — จะเห็นหน้า welcome ของ Rails
กด Ctrl+C เพื่อหยุด server (เดี๋ยวเปิดใหม่ทีหลัง)
Step 3 — สร้าง Model แรก
# generate migration สำหรับสร้าง table employees
rails generate model Employee name:string salary:decimal position:string
คำสั่งนี้สร้างให้ 3 อย่าง:
create  db/migrate/20260309134857_create_employees.rb   # migration file
create  app/models/employee.rb                           # model file
create  test/models/employee_test.rb                     # test file
ดู migration file ที่ generate มา:
# db/migrate/20260309134857_create_employees.rb
class CreateEmployees < ActiveRecord::Migration[8.1]
  def change
    create_table :employees do |t|
      t.string :name
      t.decimal :salary
      t.string :position

      t.timestamps   # สร้าง created_at และ updated_at ให้อัตโนมัติ
    end
  end
end
รัน migration เพื่อสร้าง table จริงใน database:
rails db:migrateoutput:
== CreateEmployees: migrating =================================================
-- create_table(:employees)
   -> 0.0012s
== CreateEmployees: migrated (0.0013s) ========================================
ถ้าใช้ SQLite: ไฟล์ database อยู่ที่
db/development.sqlite3— ไม่ต้อง setup อะไรเลย ถ้าใช้ PostgreSQL + Docker: ตรวจสอบว่าdocker compose up -dรันอยู่
Step 4 — ลองเล่นกับ Model ใน Rails Console
rails console
# หรือแบบสั้น
rails c
Rails Console คือ interactive Ruby shell ที่ load app ทั้งตัวมาให้ — ลอง CRUD ได้เลย:
# สร้าง employee
Employee.create(name: "Somchai", salary: 30000, position: "Developer")
# => INSERT INTO "employees" ("name", "salary", "position", "created_at", "updated_at")
#    VALUES ('Somchai', 30000, 'Developer', '2026-03-09 13:48:57', '2026-03-09 13:48:57')

# อ่านทั้งหมด
Employee.all
# => [#<Employee id: 1, name: "Somchai", salary: 30000, position: "Developer", ...>]

# หาด้วย id
emp = Employee.find(1)

# หาด้วยเงื่อนไข
Employee.where("salary > ?", 25000)
Employee.where(position: "Developer")

# อัปเดต
emp.update(salary: 35000)

# ลบ
emp.destroy

# สร้างเพิ่มอีกสัก 2-3 คน สำหรับ step ถัดไป
Employee.create(name: "Somchai", salary: 30000, position: "Developer")
Employee.create(name: "Somsri", salary: 54000, position: "Manager")
Employee.create(name: "Junior", salary: 20000, position: "Intern")

# นับ
Employee.count        # => 3
Employee.where("salary > ?", 25000).count  # => 2

# exit console
exit
Step 5 — สร้าง Controller และ Route
rails generate controller Employees index showได้:
create  app/controllers/employees_controller.rb    # controller
create  app/views/employees/index.html.erb         # view สำหรับ index
create  app/views/employees/show.html.erb          # view สำหรับ show
 route  get 'employees/index'
        get 'employees/show'
แก้ routes ให้เป็น RESTful:
# config/routes.rb
Rails.application.routes.draw do
  root "employees#index"       # หน้าแรก → employees#index
  resources :employees          # สร้าง 7 RESTful routes ให้อัตโนมัติ
end
ดู routes ทั้งหมดที่ได้:
rails routesoutput:
      Prefix Verb   URI Pattern                    Controller#Action
        root GET    /                              employees#index
   employees GET    /employees(.:format)           employees#index
             POST   /employees(.:format)           employees#create
new_employee GET    /employees/new(.:format)       employees#new
edit_employee GET   /employees/:id/edit(.:format)  employees#edit
    employee GET    /employees/:id(.:format)       employees#show
             PATCH  /employees/:id(.:format)       employees#update
             DELETE /employees/:id(.:format)       employees#destroy
resources :employees บรรทัดเดียว → 8 routes
Step 6 — เขียน Controller Logic
# app/controllers/employees_controller.rb
class EmployeesController < ApplicationController
  def index
    @employees = Employee.all
  end

  def show
    @employee = Employee.find(params[:id])
  end

  def new
    @employee = Employee.new
  end

  def create
    @employee = Employee.new(employee_params)

    if @employee.save
      redirect_to @employee, notice: "Employee was successfully created."
    else
      render :new, status: :unprocessable_entity
    end
  end

  def edit
    @employee = Employee.find(params[:id])
  end

  def update
    @employee = Employee.find(params[:id])

    if @employee.update(employee_params)
      redirect_to @employee, notice: "Employee was successfully updated."
    else
      render :edit, status: :unprocessable_entity
    end
  end

  def destroy
    @employee = Employee.find(params[:id])
    @employee.destroy
    redirect_to employees_url, notice: "Employee was successfully destroyed."
  end

  private

  # Strong Parameters — whitelist เฉพาะ field ที่อนุญาต
  # ป้องกัน mass assignment attack (เช่น user แอบส่ง admin: true มาด้วย)
  def employee_params
    params.require(:employee).permit(:name, :salary, :position)
  end
end
อธิบาย flow:
- User เปิด
/employees→ Rails เรียกEmployeesController#index - Controller ดึงข้อมูลจาก Model →
Employee.all - เก็บไว้ใน instance variable
@employees→ ส่งต่อให้ View อัตโนมัติ - Rails render
app/views/employees/index.html.erb
Step 7 — เขียน View
<!-- app/views/employees/index.html.erb -->
<h1>Employees</h1>

<%= link_to "New Employee", new_employee_path %>

<table>
  <thead>
    <tr>
      <th>Name</th>
      <th>Position</th>
      <th>Salary</th>
    </tr>
  </thead>
  <tbody>
    <% @employees.each do |employee| %>
      <tr>
        <td><%= link_to employee.name, employee %></td>
        <td><%= employee.position %></td>
        <td><%= number_to_currency(employee.salary, unit: "฿") %></td>
      </tr>
    <% end %>
  </tbody>
</table>
<!-- app/views/employees/show.html.erb -->
<h1><%= @employee.name %></h1>
<p><strong>Position:</strong> <%= @employee.position %></p>
<p><strong>Salary:</strong> <%= number_to_currency(@employee.salary, unit: "฿") %></p>
<%= link_to "Edit", edit_employee_path(@employee) %> |
<%= link_to "Back to Employees", employees_path %>
<%= button_to "Delete", @employee, method: :delete,
data: { turbo_confirm: "Are you sure?" } %><!-- app/views/employees/new.html.erb -->
<h1>New Employee</h1>
<%= render "form", employee: @employee %>
<%= link_to "Back to Employees", employees_path %><!-- app/views/employees/edit.html.erb -->
<h1>Edit Employee</h1>
<%= render "form", employee: @employee %>
<%= link_to "Back to Employees", employees_path %><!-- app/views/employees/_form.html.erb (partial — ชื่อขึ้นต้นด้วย _) -->
<%= form_with(model: employee) do |form| %>
<% if employee.errors.any? %>
<div style="color: red;">
<h3><%= pluralize(employee.errors.count, "error") %> prohibited this employee from being saved:</h3>
<ul>
<% employee.errors.each do |error| %>
<li><%= error.full_message %></li>
<% end %>
</ul>
</div>
<% end %>
<div>
<%= form.label :name %>
<%= form.text_field :name %>
</div>
<div>
<%= form.label :position %>
<%= form.text_field :position %>
</div>
<div>
<%= form.label :salary %>
<%= form.number_field :salary, step: 1000 %>
</div>
<div>
<%= form.submit %>
</div>
<% end %>อธิบาย ERB syntax:
<% %>— รัน Ruby code (ไม่แสดงผล)<%= %>— รัน Ruby code แล้วแสดงผลลงใน HTML<%= link_to "text", path %>— สร้าง<a href="...">text</a><%= form_with(model: employee) %>— สร้าง<form>ที่รู้ว่า POST หรือ PATCH อัตโนมัติ- Partial (
_form.html.erb) — reusable view component, เรียกด้วยrender "form"
Step 8 — เพิ่ม Validation ให้ Model
# app/models/employee.rb
class Employee < ApplicationRecord
  validates :name, presence: true
  validates :salary, presence: true, numericality: { greater_than: 0 }
  validates :position, presence: true
end
ลองใน console:
rails c

emp = Employee.new(name: "Test", salary: 0, position: "Dev")
emp.valid?        # => false
emp.errors.full_messages
# => ["Salary must be greater than 0"]

emp = Employee.new(salary: 30000)
emp.valid?        # => false
emp.errors.full_messages
# => ["Name can't be blank", "Position can't be blank"]

emp.save          # => false (ไม่บันทึกเพราะ invalid)
ตอนนี้ถ้า user submit form โดยไม่กรอกชื่อ หรือใส่เงินเดือน 0 — Rails จะ render form กลับมาพร้อมแสดง error messages อัตโนมัติ
Step 9 — รัน!
rails serverเปิด http://localhost:3000 — ได้ระบบจัดการพนักงานพร้อม CRUD เต็มรูปแบบ:
http://localhost:3000/employees— ดูพนักงานทั้งหมดhttp://localhost:3000/employees/new— เพิ่มพนักงานใหม่http://localhost:3000/employees/1— ดูข้อมูลพนักงาน id 1http://localhost:3000/employees/1/edit— แก้ไขข้อมูลพนักงาน
Step 10 — เพิ่มระบบลงเวลา (Associations)
rails generate model Attendance employee:references check_in:datetime check_out:datetime
rails db:migrate
# app/models/attendance.rb (generate มาให้แล้ว)
class Attendance < ApplicationRecord
belongs_to :employee
validates :check_in, presence: true
# จำนวนชั่วโมงที่ทำงาน = check_out - check_in (แปลงเป็นชั่วโมง)
def hours_worked
return 0 unless check_in && check_out
((check_out - check_in) / 1.hour).round(2)
end
# ถ้าทำงานเกิน 8 ชม. → ส่วนเกินคือ OT
def ot_hours
[ hours_worked - 8, 0 ].max.round(2)
end
# custom validation = เขียน method ตรวจสอบเอง
# ใช้เมื่อ built-in validates ทำไม่ได้
validate :check_out_after_check_in
validate :one_attendance_per_day
private
# Rule: check out ต้องหลัง check in
def check_out_after_check_in
return unless check_in && check_out
if check_out <= check_in
errors.add(:check_out, "must be after check in")
end
end
# Rule: พนักงาน 1 คน เข้างานได้ 1 ครั้งต่อวัน
def one_attendance_per_day
return unless check_in && employee
same_day = employee.attendances.where(check_in: check_in.all_day)
same_day = same_day.where.not(id: id) if persisted?
if same_day.exists?
errors.add(:check_in, "already has attendance for this day")
end
end
endสังเกต — Attendance มี custom validation 2 ตัว:
check_out_after_check_in— เช็คว่าเวลาออกต้องหลังเวลาเข้าone_attendance_per_day— พนักงาน 1 คนลงเวลาได้แค่วันละ 1 ครั้ง
นี่คือพลังของ validate (ไม่มี s) — เขียน method ตรวจสอบเงื่อนไขอะไรก็ได้ที่ built-in validates ทำไม่ได้
# app/models/employee.rb — เพิ่ม association + payroll methods
class Employee < ApplicationRecord
  has_many :attendances, dependent: :destroy   # ลบพนักงาน → ลบ attendance ด้วย

  validates :name, presence: true
  validates :salary, presence: true, numericality: { greater_than: 0 }
  validates :position, presence: true

  # --- Payroll Methods ---
  # ทุก method รับ month, year เพื่อคำนวณเฉพาะเดือนนั้น

  # จำนวนวันที่มาทำงานในเดือนนั้น
  def working_days(month, year)
    monthly_attendances(month, year).count
  end

  # รวม OT ทั้งเดือน (ชม.)
  def total_ot_hours(month, year)
    monthly_attendances(month, year).sum(&:ot_hours)
  end

  # OT Pay = OT hours × rate ต่อชม.
  # rate = เงินเดือน / 30 วัน / 8 ชม.
  def ot_pay(month, year)
    hourly_rate = salary / 30.0 / 8.0
    total_ot_hours(month, year) * hourly_rate
  end

  # ภาษีแบบขั้นบันได (progressive tax)
  # ≤ 30,000       → 0%
  # 30,001-50,000  → 5%
  # > 50,000       → 10%
  #
  # ตัวอย่าง: เงินเดือน 54,000
  # - 0-30,000:      0%  → 0
  # - 30,001-50,000: 5%  → 20,000 × 0.05 = 1,000
  # - 50,001-54,000: 10% → 4,000 × 0.10  = 400
  # รวมภาษี = 1,400
  def tax
    return 0 if salary <= 30_000

    if salary > 50_000
      (salary - 50_000) * 0.10 + 20_000 * 0.05
    else
      (salary - 30_000) * 0.05
    end
  end

  # Net Pay = เงินเดือน + OT Pay - ภาษี
  def net_pay(month, year)
    salary + ot_pay(month, year) - tax
  end

  private

  # helper: ดึง attendance records ของเดือนนั้น
  def monthly_attendances(month, year)
    start_date = Date.new(year, month, 1)
    end_date = start_date.end_of_month
    attendances.where(check_in: start_date.beginning_of_day..end_date.end_of_day)
  end
end
นี่คือจุดที่ Rails เริ่มน่าสนใจ — Model ไม่ใช่แค่เก็บข้อมูล แต่มี business logic จริงๆ: คำนวณ OT, ภาษีขั้นบันได, Net Pay ลอง console ดู:
rails c

emp = Employee.find_by(name: "Somchai")  # salary: 30,000

# สมมุติมี 2 วันลงเวลา
emp.working_days(3, 2026)   # => 2
emp.total_ot_hours(3, 2026) # => 4.0
emp.ot_pay(3, 2026)         # => 500.0  (125 บาท/ชม. × 4 ชม.)
emp.tax                      # => 0     (เงินเดือน ≤ 30,000)
emp.net_pay(3, 2026)         # => 30500 (30,000 + 500 - 0)
# config/routes.rb — nested resource
Rails.application.routes.draw do
root "employees#index"
resources :employees do
resources :attendances, only: [:new, :create, :edit, :update, :destroy]
end
endrails generate controller Attendances new create edit update destroy# app/controllers/attendances_controller.rb
class AttendancesController < ApplicationController
before_action :set_employee
before_action :set_attendance, only: %i[ edit update destroy ]
def new
@attendance = @employee.attendances.new
end
def create
@attendance = @employee.attendances.new(attendance_params)
if @attendance.save
redirect_to @employee, notice: "Attendance recorded."
else
render :new, status: :unprocessable_entity
end
end
def edit
end
def update
if @attendance.update(attendance_params)
redirect_to @employee, notice: "Attendance updated."
else
render :edit, status: :unprocessable_entity
end
end
def destroy
@attendance.destroy!
redirect_to @employee, notice: "Attendance deleted.", status: :see_other
end
private
# ดึง employee จาก URL (params[:employee_id])
def set_employee
@employee = Employee.find(params[:employee_id])
end
# ดึง attendance จาก URL (params[:id])
# ค้นผ่าน @employee.attendances เพื่อป้องกันเข้าถึง attendance ของคนอื่น
def set_attendance
@attendance = @employee.attendances.find(params[:id])
end
# Strong Parameters: อนุญาตเฉพาะ field ที่กำหนด
def attendance_params
params.require(:attendance).permit(:check_in, :check_out)
end
endเพิ่ม attendance section ใน employee show page:
<!-- เพิ่มท้าย app/views/employees/show.html.erb -->

<h3>Attendance Records</h3>

<%= link_to "Add Attendance", new_employee_attendance_path(@employee) %>

<table>
  <thead>
    <tr>
      <th>Date</th>
      <th>Check In</th>
      <th>Check Out</th>
      <th>Hours</th>
      <th>OT</th>
      <th></th>
    </tr>
  </thead>
  <tbody>
    <% @employee.attendances.order(check_in: :desc).each do |att| %>
      <tr>
        <td><%= att.check_in.strftime("%Y-%m-%d") %></td>
        <td><%= att.check_in.strftime("%H:%M") %></td>
        <td><%= att.check_out&.strftime("%H:%M") || "-" %></td>
        <td><%= att.hours_worked %> hrs</td>
        <td><%= att.ot_hours %> hrs</td>
        <td>
          <%= link_to "Edit", edit_employee_attendance_path(@employee, att) %>
          <%= button_to "Delete", employee_attendance_path(@employee, att),
              method: :delete, data: { turbo_confirm: "Delete this record?" } %>
        </td>
      </tr>
    <% end %>
  </tbody>
</table>
Bonus — คำสั่งที่ใช้บ่อย
# Server
rails server              # รัน server (port 3000)
rails s -p 4000           # รัน server port อื่น

# Console
rails console             # interactive shell
rails c --sandbox         # sandbox mode — rollback ทุกอย่างตอน exit

# Generate
rails g model User name:string email:string
rails g controller Pages home about
rails g migration AddDepartmentToEmployees department:string

# Database
rails db:migrate           # รัน pending migrations
rails db:rollback          # undo migration ล่าสุด
rails db:seed              # รัน db/seeds.rb
rails db:reset             # drop + create + migrate + seed

# Routes
rails routes               # ดู routes ทั้งหมด
rails routes -g employee   # filter เฉพาะที่มีคำว่า employee

# Tests
rails test                 # รัน test ทั้งหมด
rails test test/models/    # รัน test เฉพาะ folder

# อื่นๆ
rails -T                   # ดู task ทั้งหมดที่มี
rails about                # ดู version ของ Rails, Ruby, database
Scaffold — ทางลัดสำหรับคนขี้เกียจ (หรือคนฉลาด)
ทุกอย่างที่เราทำใน Step 3-9 สามารถทำได้ด้วย คำสั่งเดียว:
rails generate scaffold Employee name:string salary:decimal position:string
rails db:migrate
rails server
scaffold generate ให้ครบ: Model, Controller (ทุก action), Views (ทุก page), Migration, Routes, Tests — 3 คำสั่ง ได้ CRUD เต็มรูปแบบ
แต่การเขียน step by step ทำให้เข้าใจว่าแต่ละส่วนทำอะไร ก่อนจะใช้ shortcut
MVC — หัวใจของ Rails
Model — ข้อมูลและ business logic
# app/models/employee.rb
class Employee < ApplicationRecord
  # Associations — ความสัมพันธ์ระหว่าง model
  has_many :attendances, dependent: :destroy

  # Validations — ตรวจสอบข้อมูลก่อนบันทึก
  validates :name, presence: true
  validates :salary, presence: true, numericality: { greater_than: 0 }
  validates :position, presence: true

  # Scopes — query ที่ใช้บ่อย ตั้งชื่อให้
  scope :managers, -> { where(position: "Manager") }
  scope :high_salary, -> { where("salary > ?", 50000) }

  # Business logic — คำนวณ payroll
  def tax
    return 0 if salary <= 30_000
    if salary > 50_000
      (salary - 50_000) * 0.10 + 20_000 * 0.05
    else
      (salary - 30_000) * 0.05
    end
  end

  def net_pay(month, year)
    salary + ot_pay(month, year) - tax
  end
end
Active Record — ORM ของ Rails
# สร้าง
emp = Employee.create(name: "Somchai", salary: 30000, position: "Developer")

# อ่าน
emp = Employee.find(1)
managers = Employee.managers.high_salary
devs = Employee.where(position: "Developer").order(:name)

# อัปเดต
emp.update(salary: 35000)

# ลบ
emp.destroy

# Query ซับซ้อน — ยังอ่านง่าย
Employee.joins(:attendances)
    .where(attendances: { check_in: Date.today.all_day })
    .distinct
    .pluck(:name, :position)
ไม่ต้องเขียน SQL เลย — Active Record แปลง Ruby method chain เป็น SQL ให้
Controller — จัดการ request/response
# app/controllers/employees_controller.rb
class EmployeesController < ApplicationController
  before_action :set_employee, only: [:show, :edit, :update, :destroy]

  def index
    @employees = Employee.all
  end

  def show
    # @employee ถูก set แล้วจาก before_action
  end

  def create
    @employee = Employee.new(employee_params)

    if @employee.save
      redirect_to @employee, notice: "Employee was successfully created."
    else
      render :new, status: :unprocessable_entity
    end
  end

  def update
    if @employee.update(employee_params)
      redirect_to @employee, notice: "Employee was successfully updated."
    else
      render :edit, status: :unprocessable_entity
    end
  end

  def destroy
    @employee.destroy
    redirect_to employees_url, notice: "Employee was successfully destroyed."
  end

  private

  def set_employee
    @employee = Employee.find(params[:id])
  end

  # Strong Parameters — ป้องกัน mass assignment attack
  def employee_params
    params.require(:employee).permit(:name, :salary, :position)
  end
end
View — แสดงผล
<!-- app/views/employees/index.html.erb -->
<h1>Employees</h1>

<% @employees.each do |employee| %>
  <article>
    <h2><%= link_to employee.name, employee %></h2>
    <p><%= employee.position %> — <%= number_to_currency(employee.salary, unit: "฿") %></p>
  </article>
<% end %>

<%= link_to "New Employee", new_employee_path %>
Routes — URL mapping
# config/routes.rb
Rails.application.routes.draw do
  root "employees#index"
  resources :employees do
    resources :attendances, only: [:new, :create, :edit, :update, :destroy]
  end

  # resources :employees สร้าง 7 routes ให้อัตโนมัติ:
  # GET    /employees          → employees#index
  # GET    /employees/new      → employees#new
  # POST   /employees          → employees#create
  # GET    /employees/:id      → employees#show
  # GET    /employees/:id/edit → employees#edit
  # PATCH  /employees/:id      → employees#update
  # DELETE /employees/:id      → employees#destroy
end
Migration — version control สำหรับ database
# db/migrate/20260309134857_create_employees.rb
class CreateEmployees < ActiveRecord::Migration[8.1]
  def change
    create_table :employees do |t|
      t.string :name
      t.decimal :salary
      t.string :position
      t.timestamps  # สร้าง created_at และ updated_at ให้
    end
  end
end
# db/migrate/20260309135217_create_attendances.rb
class CreateAttendances < ActiveRecord::Migration[8.1]
def change
create_table :attendances do |t|
t.references :employee, null: false, foreign_key: true
t.datetime :check_in
t.datetime :check_out
t.timestamps
end
end
endMigration ทำให้:
- Database schema อยู่ใน version control ได้
- ทีมทุกคน sync database structure ได้ด้วย
rails db:migrate - Rollback ได้ด้วย
rails db:rollback
Part 2 — ของดีๆ ที่มากับ Rails
สิ่งที่ framework อื่นต้องหาเอง แต่ Rails มีให้
Action Mailer — ส่ง email
class PayrollMailer < ApplicationMailer
  def payslip_email(employee, month, year)
    @employee = employee
    @month = month
    @year = year
    mail(to: @employee.email, subject: "Payslip for #{month}/#{year}")
  end
end

# เรียกใช้
PayrollMailer.payslip_email(employee, 3, 2026).deliver_later
Active Job — background processing
class CalculatePayrollJob < ApplicationJob
  queue_as :default

  def perform(month, year)
    Employee.find_each do |employee|
      PayrollMailer.payslip_email(employee, month, year).deliver_later
    end
  end
end

# เรียกใช้
CalculatePayrollJob.perform_later(3, 2026)
Action Cable — WebSocket
class AttendanceChannel < ApplicationCable::Channel
  def subscribed
    stream_from "attendance_updates"
  end
end

# broadcast เมื่อมีคน check in
ActionCable.server.broadcast("attendance_updates", {
  employee: employee.name,
  action: "checked_in",
  time: Time.current
})
Active Storage — file upload
class Employee < ApplicationRecord
  has_one_attached :profile_photo
end

# ใน controller
employee.profile_photo.attach(params[:profile_photo])
Turbo + Hotwire — SPA-like experience ไม่ต้องเขียน JavaScript
Rails 7+ มาพร้อม Hotwire ที่ทำให้หน้าเว็บรู้สึกเร็วเหมือน SPA โดยไม่ต้องเขียน JavaScript framework แยก
<!-- Turbo Frame — อัปเดตแค่ส่วนที่ต้องการ ไม่ต้อง reload ทั้งหน้า -->
<%= turbo_frame_tag "attendance_list" do %>
  <%= render @employee.attendances %>
<% end %>
Testing — มากับ Rails ตั้งแต่วันแรก
Rails ให้ความสำคัญกับ test มาก — rails new สร้าง folder test/ มาให้เลย ไม่ต้อง setup เอง ไม่ต้องเลือก test framework ไม่ต้อง config อะไร
test/
├── models/           # unit test — test model logic
├── controllers/      # test controller behavior
├── integration/      # test หลาย request ต่อกัน
├── system/           # test แบบเปิด browser จริง (Capybara + Selenium)
├── helpers/           # test helper methods
├── mailers/           # test email
├── fixtures/          # test data (เหมือน seed แต่สำหรับ test)
└── test_helper.rb     # config กลาง
Model Test — test logic ของ model
# test/models/employee_test.rb
require "test_helper"

class EmployeeTest < ActiveSupport::TestCase
  test "valid employee" do
    emp = Employee.new(name: "Test", salary: 30000, position: "Dev")
    assert emp.valid?
  end

  test "invalid without name" do
    emp = Employee.new(salary: 30000, position: "Dev")
    assert_not emp.valid?
  end

  test "invalid with zero salary" do
    emp = Employee.new(name: "Test", salary: 0, position: "Dev")
    assert_not emp.valid?
  end

  # --- ภาษีขั้นบันได ---

  test "tax 0 for salary 30000" do
    assert_equal 0, employees(:somchai).tax
  end

  test "tax for salary 54000" do
    # (5%*20,000) + (10%*4,000) = 1,400
    assert_equal 1400, employees(:somsri).tax
  end

  test "tax for salary 40000" do
    emp = Employee.new(name: "Mid", salary: 40000, position: "Dev")
    # (40,000 - 30,000) × 5% = 500
    assert_equal 500, emp.tax
  end

  # --- OT & Payroll ---

  test "working_days counts attendances in month" do
    # somchai มี 2 records ใน March 2026
    assert_equal 2, employees(:somchai).working_days(3, 2026)
  end

  test "total_ot_hours" do
    # somchai: day1 = 9h (1h OT), day2 = 11h (3h OT) → 4h
    assert_equal 4, employees(:somchai).total_ot_hours(3, 2026)
  end

  test "net_pay calculation" do
    # somchai: 30000 + 500 - 0 = 30500
    assert_equal 30500, employees(:somchai).net_pay(3, 2026)
  end
end
สังเกตว่า test ของ payroll มันสนุก — ไม่ใช่แค่ test ว่า save ได้/ไม่ได้ แต่ test business logic จริงๆ: ภาษีขั้นบันได, OT hours, Net Pay
Model Test — test Attendance
# test/models/attendance_test.rb
require "test_helper"

class AttendanceTest < ActiveSupport::TestCase
  test "hours_worked 8 hours" do
    att = Attendance.new(
      check_in: Time.zone.parse("2026-03-05 09:00"),
      check_out: Time.zone.parse("2026-03-05 17:00")
    )
    assert_equal 8.0, att.hours_worked
  end

  test "ot_hours 3 for 11h day" do
    att = Attendance.new(
      check_in: Time.zone.parse("2026-03-05 09:00"),
      check_out: Time.zone.parse("2026-03-05 20:00")
    )
    assert_equal 3.0, att.ot_hours
  end

  test "check_out must be after check_in" do
    att = Attendance.new(
      employee: employees(:junior),
      check_in: Time.zone.parse("2026-03-05 17:00"),
      check_out: Time.zone.parse("2026-03-05 09:00")
    )
    assert_not att.valid?
    assert_includes att.errors[:check_out], "must be after check in"
  end

  test "one attendance per day" do
    # somchai มี attendance วันที่ 2 March แล้ว (จาก fixture)
    att = Attendance.new(
      employee: employees(:somchai),
      check_in: Time.zone.parse("2026-03-02 08:00"),
      check_out: Time.zone.parse("2026-03-02 16:00")
    )
    assert_not att.valid?
    assert_includes att.errors[:check_in], "already has attendance for this day"
  end
end
Controller Test — test ว่า request ทำงานถูกต้อง
# test/controllers/employees_controller_test.rb
require "test_helper"

class EmployeesControllerTest < ActionDispatch::IntegrationTest
  test "should get index" do
    get employees_url
    assert_response :success    # ได้ status 200
  end

  test "should create employee" do
    assert_difference("Employee.count", 1) do
      post employees_url, params: {
        employee: { name: "New Dev", salary: 30000, position: "Developer" }
      }
    end
    assert_redirected_to employee_url(Employee.last)
  end

  test "should not create employee with invalid data" do
    assert_no_difference("Employee.count") do
      post employees_url, params: {
        employee: { name: "", salary: 0, position: "" }     # validation fail
      }
    end
    assert_response :unprocessable_entity
  end

  test "should destroy employee" do
    assert_difference("Employee.count", -1) do
      delete employee_url(employees(:one))    # :one มาจาก fixtures
    end
    assert_redirected_to employees_url
  end
end
System Test — test แบบเปิด browser จริง
# test/system/employees_test.rb
require "application_system_test_case"

class EmployeesTest < ApplicationSystemTestCase
  test "creating an employee" do
    visit employees_url
    click_on "New Employee"

    fill_in "Name", with: "New Developer"
    fill_in "Position", with: "Developer"
    fill_in "Salary", with: 35000
    click_on "Create Employee"

    assert_text "Employee was successfully created"
    assert_text "New Developer"
  end

  test "should show validation errors" do
    visit new_employee_url
    click_on "Create Employee"    # submit ฟอร์มเปล่า

    assert_text "Name can't be blank"
  end
end
System test เปิด browser จริง (Chrome headless) กดปุ่ม กรอกฟอร์ม เหมือน user ใช้งานจริง
Fixtures — test data
# test/fixtures/employees.yml
# เรียกใช้ใน test ด้วย employees(:somchai)

somchai:
  name: Somchai
  salary: 30000
  position: Developer

somsri:
  name: Somsri
  salary: 54000
  position: Manager

junior:
  name: Junior
  salary: 20000
  position: Intern
# test/fixtures/attendances.yml
# somchai: วันละ 9 ชม. (1h OT) และ 11 ชม. (3h OT)
somchai_day1:
employee: somchai
check_in: "2026-03-02 09:00:00"
check_out: "2026-03-02 18:00:00"
somchai_day2:
employee: somchai
check_in: "2026-03-03 09:00:00"
check_out: "2026-03-03 20:00:00"
# somsri: วันละ 9 ชม. (1h OT)
somsri_day1:
employee: somsri
check_in: "2026-03-02 08:00:00"
check_out: "2026-03-02 17:00:00"Fixtures โหลดเข้า test database อัตโนมัติก่อนรัน test ทุกครั้ง — ไม่ต้องสร้าง data ซ้ำ
สังเกต — fixture ของ attendance ถูกออกแบบมาให้คำนวณ OT ได้:
- somchai_day1: 9 ชม. ทำงาน → 1 ชม. OT
- somchai_day2: 11 ชม. ทำงาน → 3 ชม. OT
- test เลยรู้ว่า somchai มี total OT = 4 ชม.
รัน test
rails test                       # รัน test ทั้งหมด
rails test test/models/          # รัน model test เท่านั้น
rails test test/models/employee_test.rb          # รัน ไฟล์เดียว
rails test test/models/employee_test.rb:10       # รัน test บรรทัดที่ 10

rails test:system                # รัน system test (เปิด browser)
เบื้องหลัง test ใน Rails ใช้อะไร?
Test ใน Rails ไม่ได้เป็น library ก้อนเดียว — มันประกอบจากหลายชิ้นที่ทำงานร่วมกัน:
rails test
    │
    ├── Minitest ─────────── test framework หลัก (เหมือน Jest)
    │   ├── assertions:      assert, assert_equal, assert_not, assert_nil...
    │   ├── test runner:      รัน test, รายงานผล, จัดลำดับ
    │   └── มากับ Ruby:       ไม่ต้อง install เพิ่ม
    │
    ├── ActiveSupport::TestCase ── Rails wrapper ครอบ Minitest
    │   ├── เพิ่ม:            fixtures loading อัตโนมัติ
    │   ├── เพิ่ม:            database transaction (rollback หลัง test จบ)
    │   └── เพิ่ม:            Rails-specific assertions
    │
    ├── ActionDispatch::IntegrationTest ── สำหรับ controller/request test
    │   ├── ทำ HTTP request:  get, post, patch, delete
    │   ├── ตรวจ response:    assert_response, assert_redirected_to
    │   └── เบื้องหลัง:       Rack::Test (จำลอง HTTP request ไม่ต้องเปิด server จริง)
    │
    ├── Capybara ─────────── สำหรับ system test (เปิด browser จริง)
    │   ├── DSL:              visit, fill_in, click_on, assert_text
    │   ├── เบื้องหลัง:       สั่ง browser ผ่าน WebDriver protocol
    │   └── เหมือน:           Cypress / Playwright แต่เขียนเป็น Ruby
    │
    └── Selenium WebDriver ── ตัวขับ browser จริง
        ├── เปิด:             Chrome headless (ไม่เห็นหน้าจอ)
        └── ทำ:               กดปุ่ม, กรอกฟอร์ม, scroll, screenshot
เปรียบเทียบกับ JS ecosystem:
Rails testing stack:          JS testing stack:

Minitest                      Jest / Vitest
  (test framework)              (test framework)
       +                             +
ActiveSupport::TestCase       (ไม่มี — ต้อง config เอง)
  (Rails integration)
       +                             +
Rack::Test                    Supertest / MSW
  (จำลอง HTTP request)          (จำลอง HTTP request)
       +                             +
Capybara                      Cypress / Playwright
  (browser automation DSL)      (browser automation)
       +                             +
Selenium                      Chromium (built-in)
  (browser driver)              (browser driver)
ความต่าง:
- JS: ต้องเลือก + install + config แต่ละตัวเอง (Jest? Vitest? Cypress? Playwright? MSW?)
- Rails: ทุกอย่างมาครบ
rails newปุ๊บ test ได้เลย ไม่ต้องตัดสินใจ
แล้ว test database ล่ะ?
Development:  payroll_app_development  ← ใช้ตอน rails server
Test:         payroll_app_test         ← ใช้ตอน rails test (คนละ database)
Production:   payroll_app_production   ← ใช้ตอน deploy
ตอนรัน test:
- Rails ใช้ database
_testแยกจาก development — data ไม่ปนกัน - แต่ละ test ถูกครอบด้วย database transaction
- test จบ → rollback ทุกอย่าง → database กลับเป็นสถานะเดิม
- test ถัดไปเริ่มจาก state ที่สะอาด → test ไม่กระทบกัน
# เบื้องหลัง (Rails ทำให้อัตโนมัติ ไม่ต้องเขียนเอง):
BEGIN TRANSACTION
  # ... รัน test ...
  # สร้าง employee, attendance อะไรก็ตาม
ROLLBACK
# database กลับเป็นเหมือนเดิม ไม่มี data ค้าง
เทียบกับ JS testing
| JavaScript (React) | Rails | |
|---|---|---|
| Unit test | Jest / Vitest | Minitest (มาพร้อม Rails) |
| Component test | React Testing Library | Controller test (Rack::Test) |
| E2E / Browser test | Cypress / Playwright | System test (Capybara + Selenium) |
| HTTP mocking | MSW / nock | Rack::Test (ไม่ต้อง mock, จำลอง request ตรง) |
| Test data | Factory / mock เอง | Fixtures (มาพร้อม Rails) |
| DB cleanup | ต้อง setup เอง | Transaction rollback อัตโนมัติ |
| Setup ครั้งแรก | install + config หลาย package | ไม่ต้อง setup มีมาให้ครบ |
| รัน | npm test | rails test |
หัวใจ: Rails community เชื่อว่า “test ที่ดี > type annotation ที่ดี” เพราะ test บอกได้ว่า code ทำงานถูกต้อง ไม่ใช่แค่ type ถูกต้อง
RSpec — alternative ที่นิยม
Minitest มากับ Rails แต่หลายทีมเลือกใช้ RSpec แทน เพราะอ่านง่ายกว่า:
# Minitest style
test "tax 0 for salary 30000" do
  assert_equal 0, employees(:somchai).tax
end

# RSpec style — อ่านเหมือนภาษาอังกฤษ
describe Employee do
  it "has 0 tax for salary 30000" do
    expect(employees(:somchai).tax).to eq 0
  end
end
ทั้งคู่ทำได้เหมือนกัน เลือกตามที่ชอบ — Minitest (simple, มาพร้อม Rails) vs RSpec (expressive, ต้องติดตั้งเพิ่ม)
Part 3 — Authentication: ระบบ Login ด้วย Devise
Devise คืออะไร?
Devise คือ gem สำหรับ authentication ที่เป็น de facto standard ของ Rails — ทุกคนใช้ แทบไม่มีใครเขียน auth เอง
เทียบกับ ecosystem อื่น:
| Framework | Auth Solution |
|---|---|
| Express.js | Passport.js (ต้อง config เอง) |
| Django | django.contrib.auth (มาพร้อม Django) |
| Laravel | Laravel Breeze / Fortify |
| Rails | Devise (gem แยก แต่เป็น standard) |
| Next.js | NextAuth.js / Clerk |
ติดตั้งและ Setup
# 1. เพิ่ม gem
bundle add devise

# 2. install Devise
rails generate devise:install
# สร้าง config/initializers/devise.rb + instructions

# 3. generate User model
rails generate devise User
# สร้าง migration + model ที่มี email, encrypted_password, etc.

# 4. run migration
rails db:migrate
แค่ 4 คำสั่ง — ได้ระบบ auth ครบ:
- Sign up / Sign in / Sign out
- Forgot password + email reset
- Remember me
- Session management
- Password encryption (bcrypt)
ใช้ใน Controller
class EmployeesController < ApplicationController
  before_action :authenticate_user!, except: [:index, :show]
  # ↑ ต้อง login ก่อนถึงจะ create/edit/delete ได้

  def create
    @employee = Employee.new(employee_params)
    # current_user = user ที่ login อยู่ (Devise ให้มา)
    ...
  end
end
ใช้ใน View
<% if user_signed_in? %>
  <p>สวัสดี, <%= current_user.email %></p>
  <%= link_to "Logout", destroy_user_session_path, data: { turbo_method: :delete } %>
<% else %>
  <%= link_to "Login", new_user_session_path %>
  <%= link_to "Sign up", new_user_registration_path %>
<% end %>
helper ที่ Devise ให้มา:
current_user— user ที่ login อยู่ (nil ถ้ายังไม่ login)user_signed_in?— login แล้วหรือยังauthenticate_user!— บังคับ login ก่อนเข้า action
Customize หน้า Login
Devise สร้าง view ให้อัตโนมัติ แต่ถ้าอยากแก้:
rails generate devise:views
# สร้าง app/views/devise/ ให้แก้ได้:
# - registrations/new.html.erb  (sign up)
# - sessions/new.html.erb       (login)
# - passwords/new.html.erb      (forgot password)
เพิ่ม field ให้ User (เช่น name, role)
rails generate migration AddNameToUsers name:string
rails db:migrate
# app/controllers/application_controller.rb
class ApplicationController < ActionController::Base
before_action :configure_permitted_parameters, if: :devise_controller?
protected
def configure_permitted_parameters
devise_parameter_sanitizer.permit(:sign_up, keys: [:name])
devise_parameter_sanitizer.permit(:account_update, keys: [:name])
end
endRails 8 Alternative: Authentication Generator
Rails 8 มี built-in authentication generator ที่ไม่ต้องใช้ Devise:
rails generate authenticationสร้าง User model + Session model + controller + views ให้ครบ — เหมาะกับคนที่อยากเข้าใจว่า auth ทำงานยังไงทุก step
เลือกยังไง:
- Devise — production-ready, มี ecosystem ใหญ่ (OAuth, OmniAuth, 2FA), ไม่ต้องดูแล auth code เอง
- rails generate authentication — เข้าใจ auth ลึก, ไม่มี dependency, customizable 100%
Part 4 — API Mode: Rails เป็น Backend อย่างเดียว
เมื่อไหร่ควรใช้ API Mode?
ถ้า frontend เป็น React / Vue / Svelte / mobile app — ไม่ต้องการ View layer ของ Rails เลย ใช้ API mode:
rails new payroll_api --apiต่างจาก Rails ปกติยังไง:
| Rails ปกติ | Rails API | |
|---|---|---|
| View layer | ERB templates | ไม่มี (ส่ง JSON) |
| Session/Cookie | มี | ไม่มี (ใช้ token) |
| CSRF protection | มี | ไม่มี |
| Middleware | ครบ | เบาลง ~30% |
| Response | HTML | JSON |
ตัวอย่าง Controller
# app/controllers/api/v1/employees_controller.rb
module Api
  module V1
    class EmployeesController < ApplicationController
      def index
        @employees = Employee.all
        render json: @employees
      end

      def show
        @employee = Employee.find(params[:id])
        render json: @employee, include: [:attendances]
      end

      def create
        @employee = Employee.new(employee_params)

        if @employee.save
          render json: @employee, status: :created
        else
          render json: { errors: @employee.errors }, status: :unprocessable_entity
        end
      end
    end
  end
end
Routes
# config/routes.rb
Rails.application.routes.draw do
  namespace :api do
    namespace :v1 do
      resources :employees do
        resources :attendances, only: [:create, :destroy]
      end
    end
  end
end
# → GET /api/v1/employees, POST /api/v1/employees, etc.
JSON Serialization
Rails มีหลายวิธีส่ง JSON:
# 1. ง่ายสุด — render json ตรงๆ
render json: @employee

# 2. เลือก field — as_json
render json: @employee.as_json(
  only: [:id, :name, :salary, :position],
  include: :attendances,
  methods: [:tax]   # เรียก method tax แล้วใส่ใน JSON ด้วย
)

# 3. ใช้ Serializer (แนะนำสำหรับ production)
# Gemfile: gem 'alba' หรือ gem 'blueprinter'
class EmployeeSerializer
  include Alba::Resource
  attributes :id, :name, :salary, :position
  attribute :tax do |employee|
    employee.tax
  end
  has_many :attendances, resource: AttendanceSerializer
end

render json: EmployeeSerializer.new(@employees)
Authentication สำหรับ API
API ไม่ใช้ cookie/session — ใช้ token แทน:
# Simple token auth
class ApplicationController < ActionController::API
  before_action :authenticate_token!

  private

  def authenticate_token!
    token = request.headers["Authorization"]&.split(" ")&.last
    @current_user = User.find_by(api_token: token)
    render json: { error: "Unauthorized" }, status: :unauthorized unless @current_user
  end
end
production จริงแนะนำ JWT (gem jwt) หรือ Doorkeeper (OAuth2 provider)
เมื่อไหร่ควรใช้ API mode vs ปกติ
| ใช้ API mode เมื่อ | ใช้ Rails ปกติ เมื่อ |
|---|---|
| Frontend เป็น React/Vue/Svelte | ใช้ Hotwire + ERB |
| Mobile app เป็น client หลัก | Web app เป็น client หลัก |
| ทีม frontend แยกจาก backend | Full-stack developer / ทีมเล็ก |
| ต้อง serve หลาย client (web + mobile + 3rd party) | Client เดียว |
ครบ 3 Part แล้ว! กลับไปอ่าน: Part 1: ทำไมต้อง Rails · Part 2: Rails ทำงานยังไง